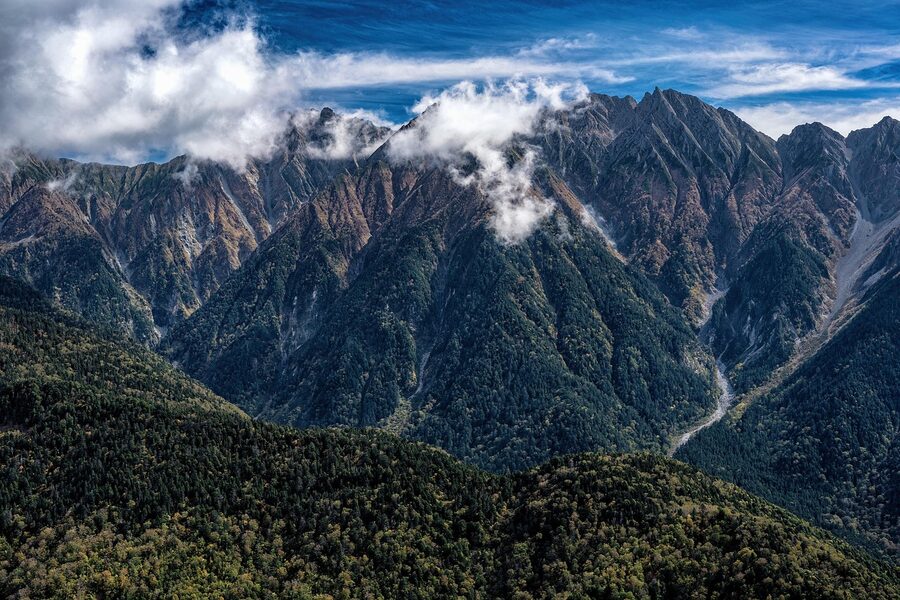
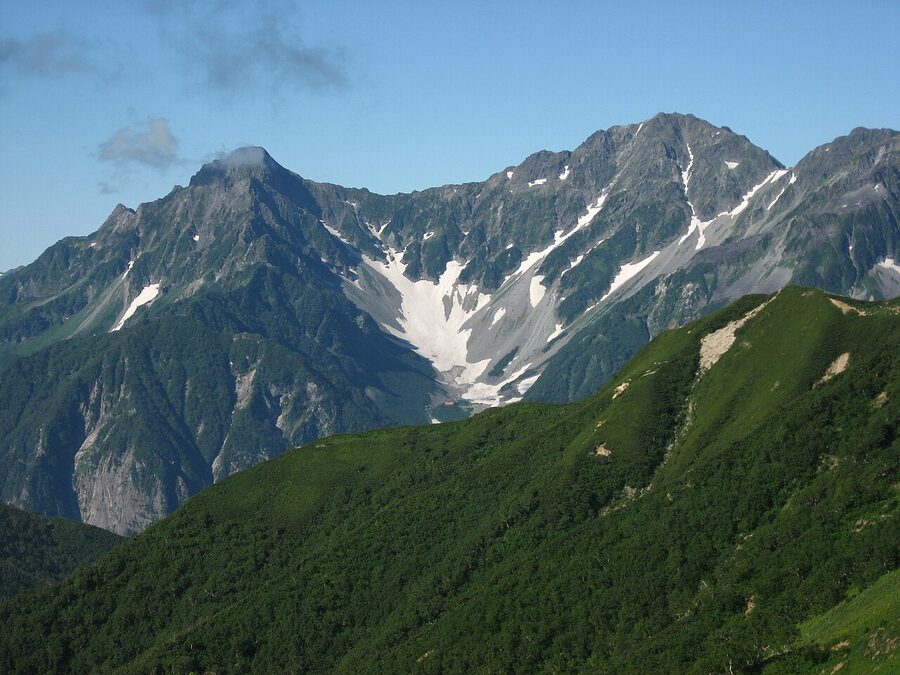
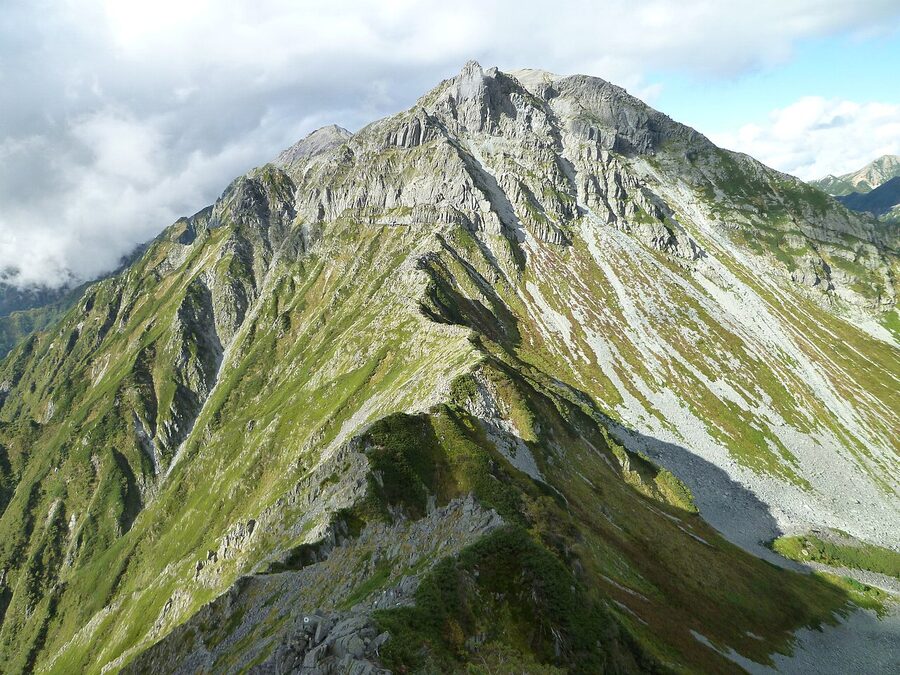
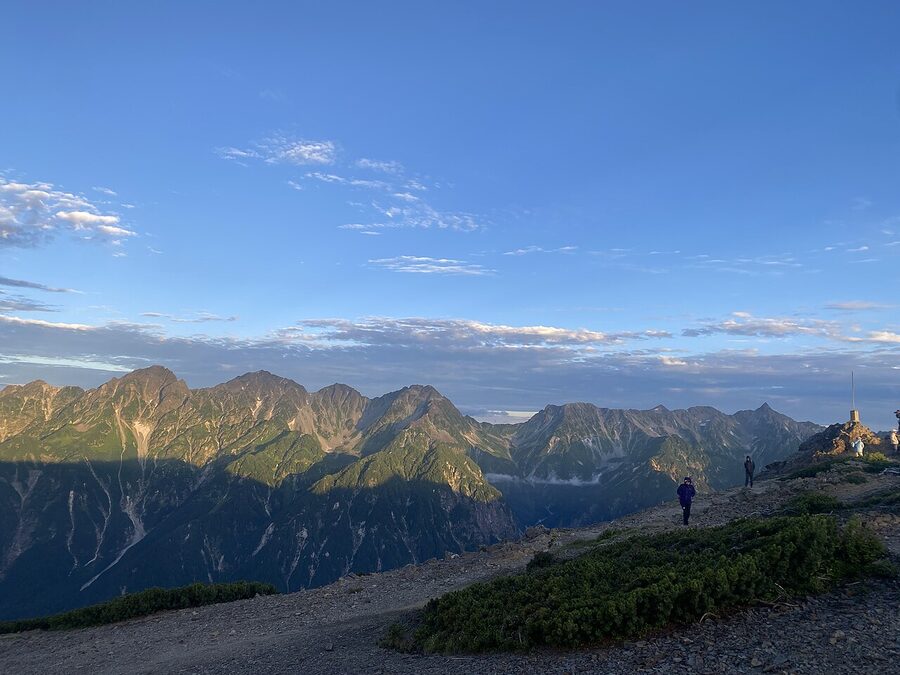
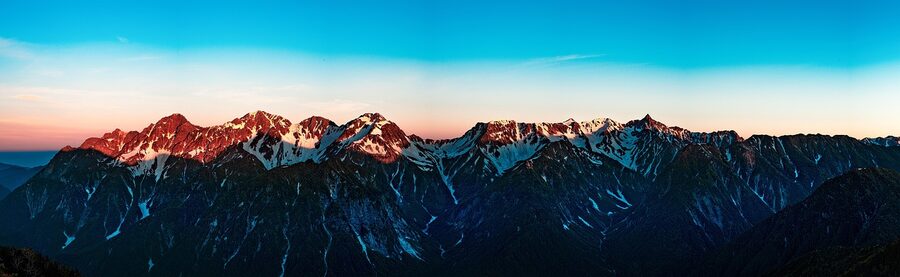
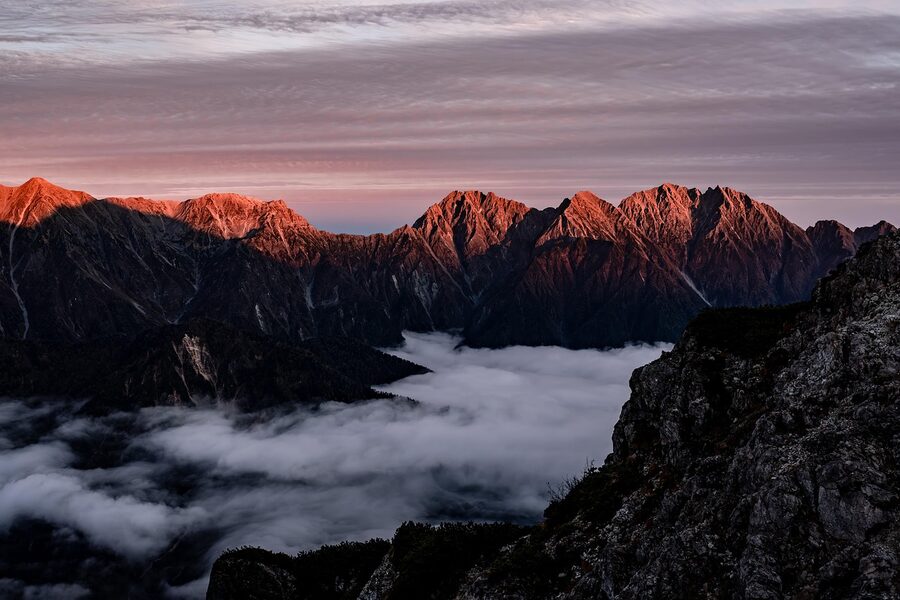
The wind hit me at the saddle just below Hotakadake-sanso, and the steel staircase, the one bolted into the rock above the hut, suddenly looked taller than it had from the photographs. A guide ahead of me pulled the chinstrap of his helmet tighter. Below the cirque the cloud was sitting flat at 2,500m, white and unbroken, like a second sky. Then a gap opened. And there, across a narrow throat of rock, was the whole Hotaka ridge: Mae, Oku, Kita. Three of the highest peaks in Japan in one frame, with the Daikiretto knife‑edge running north toward Yari. It is the view that turns a hike into a story you tell forever.
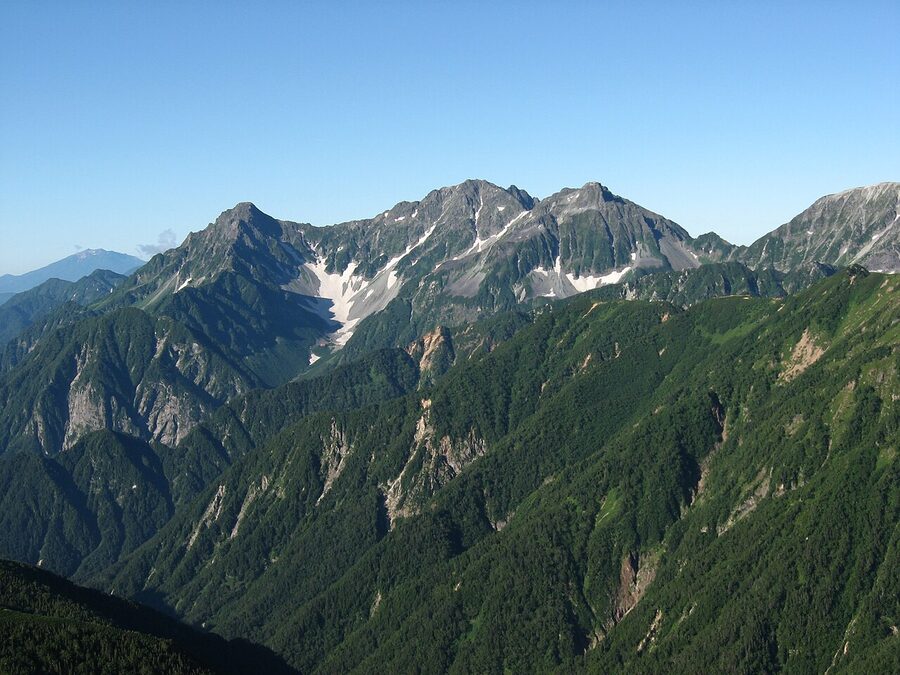
Mt Hotaka, properly Hotaka‑dake (穂高岳), is the heart of the Hotaka range and the second‑highest peak in the Northern Alps. Its main summit, Oku‑Hotaka‑dake, stands at 3,190m: third highest in Japan after Fuji and Kita‑dake. But to call this a mountain is misleading. Hotaka is a complex of four named peaks, three classic ascent routes, half a dozen working mountain huts, and the most photographed cirque in the country. You don’t just climb it. You move through it for a day or three, sleep on the ridge, and come back changed.
This guide is for two readers: the experienced alpine hiker who wants the routes laid out honestly, and the Japan traveller who has heard of Karasawa and wants to understand what they’re looking at when those autumn‑cirque photos appear in October. I’ll cover the four summits, the routes, the huts, the autumn pilgrimage, the seasons, the gear, and the iconic Yari‑Hotaka traverse via the Daikiretto. Most of the names you’ll need are in here, in the order you’ll encounter them.
In This Article
- What “Mt Hotaka” actually means
- The base: Kamikochi or Shin‑Hotaka
- The classic: Kamikochi to Karasawa to Oku‑Hotaka
- The Honjo Bridge ladder section
- Karasawa Cirque: the autumn pilgrimage
- Karasawa Hyutte vs Karasawa‑goya: which hut
- Hotakadake‑sanso and the summit push
- The Zaiten‑iwa staircase
- The four named summits, in detail
- Oku‑Hotaka‑dake (奥穂高岳, 3,190m)
- Kita‑Hotaka‑dake (北穂高岳, 3,106m)
- Mae‑Hotaka‑dake (前穂高岳, 3,090m)
- Nishi‑Hotaka‑dake (西穂高岳, 2,909m)
- The Daikiretto: Yari to Hotaka traverse
- Honestly, who should not do the Daikiretto
- The huts you’ll meet
- When to go: season notes
- Gear: what you actually need
- Connecting Hotaka to the rest of the range
- The Mae and Nishi‑side approaches in detail
- Mae‑Hotaka via Dakesawa
- Nishi‑Hotaka via Shin‑Hotaka Ropeway
- Practical: getting to the trailheads
- Why Karasawa, in particular
- Pace, fitness and the honest difficulty
- Two small things that change the trip
- What to combine it with
- The view from the top
What “Mt Hotaka” actually means

People say “Mt Hotaka” the way they say “the Lakes” in England, as a single thing, but what they mean is a connected range of four named summits running roughly north to south on the Nagano–Gifu border. From south to north:
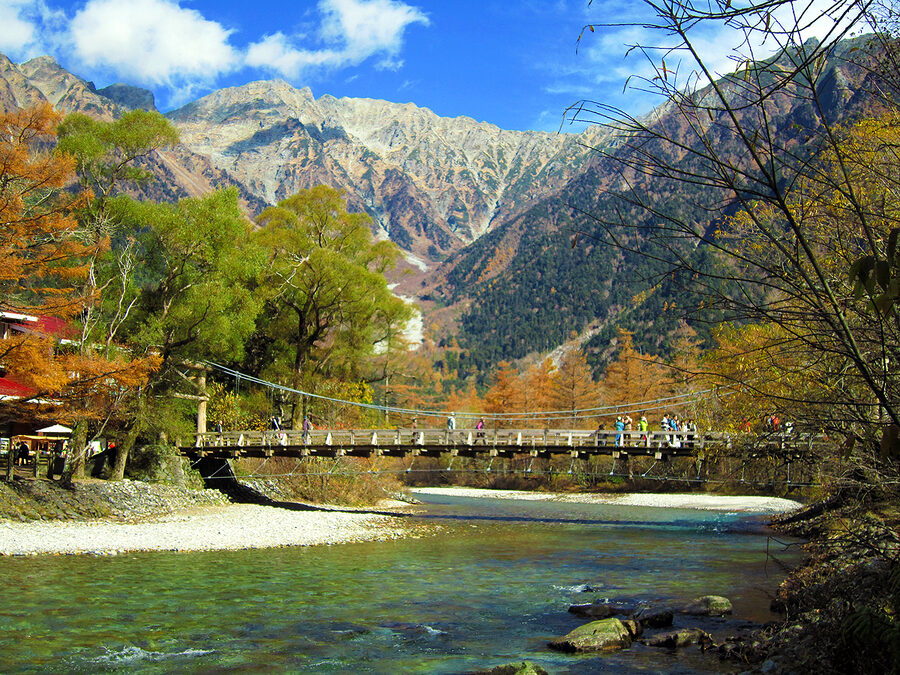
- Mae‑Hotaka‑dake (前穂高岳), 3,090m. The southernmost summit. The classic morning view from Kamikochi’s Kappa Bridge frames Mae and Oku together. It’s Japan’s 11th‑highest peak and the start of the Jonan ridge that drops back to the valley.
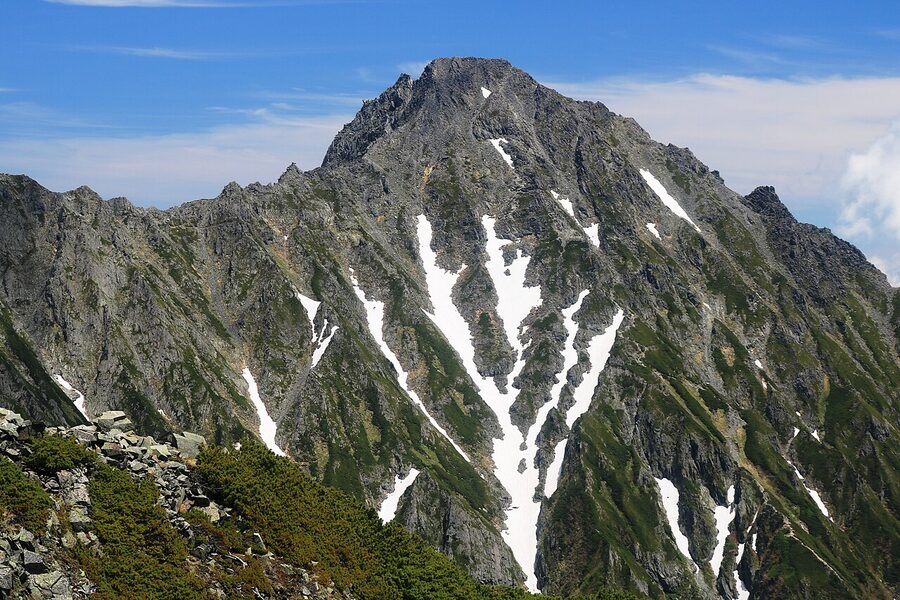
- Oku‑Hotaka‑dake (奥穂高岳), 3,190m. The main summit. Third highest in Japan. This is what people mean when they say they’ve “climbed Hotaka”. A small jizo and a stone shrine mark the top. On a clear morning you can see Fuji 130km away, and a great deal more besides.
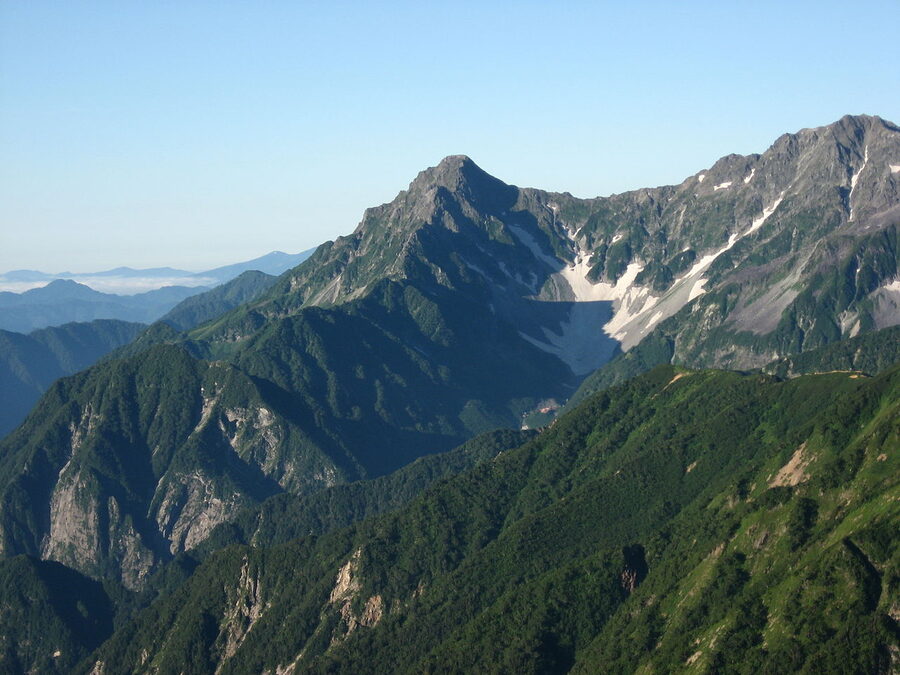
- Kita‑Hotaka‑dake (北穂高岳), 3,106m. The hardest of the four. Sits at the southern end of the Daikiretto, and most through‑hikers stay at Kita‑Hotaka‑goya, a hut perched on the summit itself with a kitchen that does a serious plate of curry.
- Nishi‑Hotaka‑dake (西穂高岳), 2,909m. The westernmost peak, accessed by ropeway. The “easy” Hotaka: you can reach the summit and be back on the cable car the same afternoon. The traverse south to Oku across the Jandarm rock tower is one of the most exposed routes in Japan and not what we mean by easy.
There are sub‑peaks in between, notably Karasawa‑dake (3,110m) sitting between Kita and Oku on the ridge, but four is the working number. If someone says they did “the Hotaka traverse”, they usually mean Oku to Nishi via Mae over a long single day, descending the Dakesawa valley. Read the Japan Alps access guide first if you’re piecing together the train and bus connections to Kamikochi or Shin‑Hotaka, because none of these summits are reached by car.
The base: Kamikochi or Shin‑Hotaka
Two valleys give access to the range, and which one you choose shapes the trip:
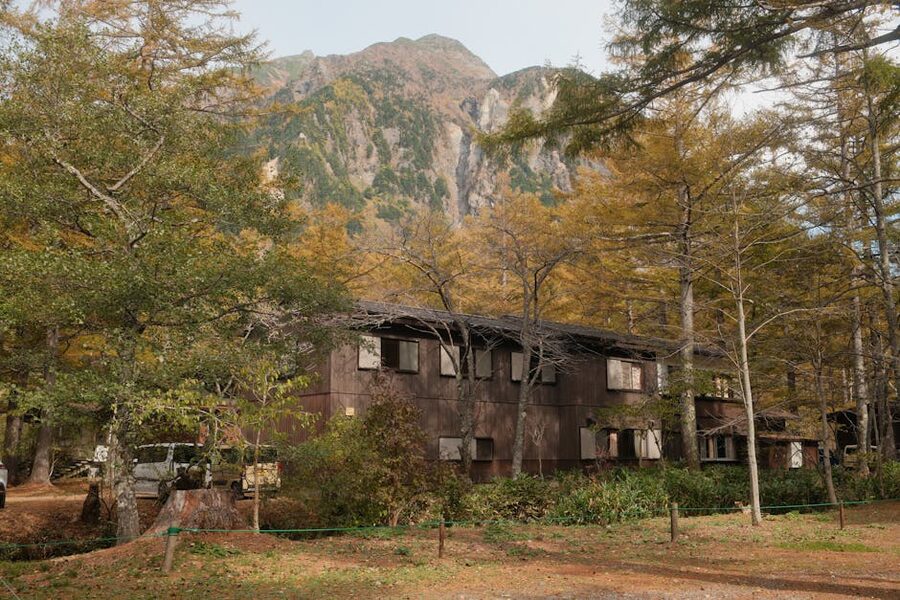
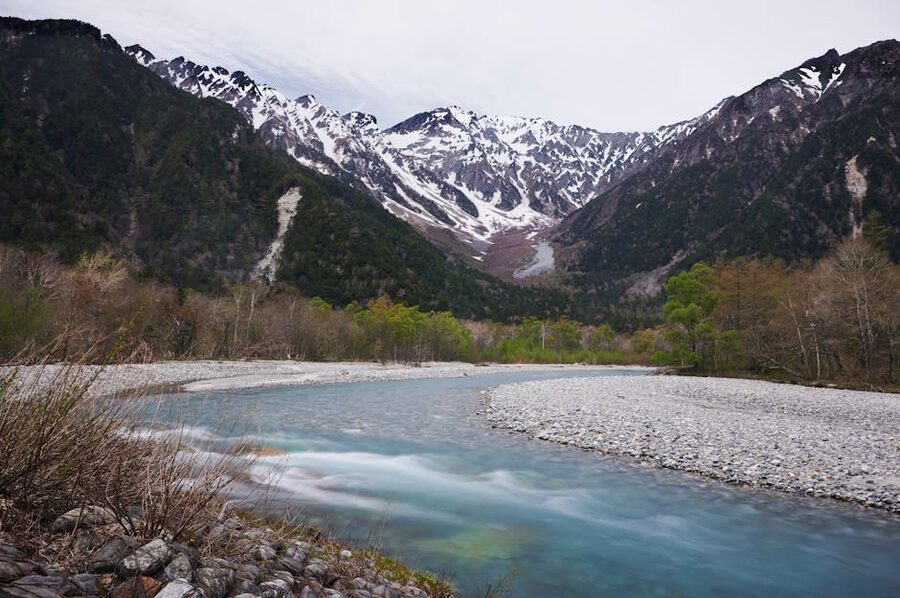
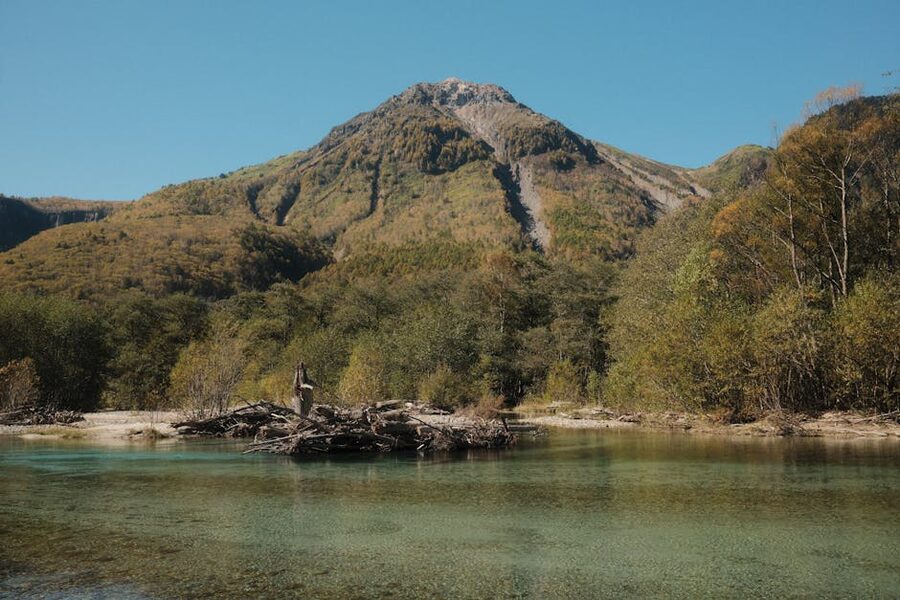
Kamikochi (上高地), Nagano side, valley floor 1,500m. This is the classic, traditional and emotionally‑weighted base. You arrive at the bus terminal with the Hotaka peaks already framed above the Azusa river, walk past the Kappa Bridge and the Imperial Hotel, then follow the river upstream for 11km of nearly flat valley before the climbing begins. It’s also where you’ll catch a return bus and start craving an onsen by hour twelve. The full Karasawa loop and the Mae‑Oku ascent both start here. For the orientation walks, hut bookings, and the 5am bus rules, the dedicated Kamikochi travel guide covers it in detail.
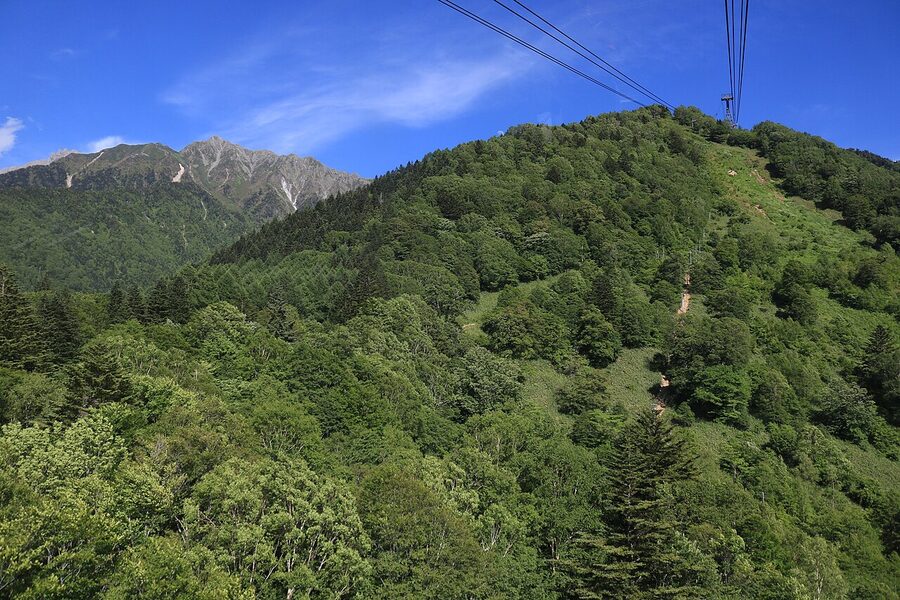
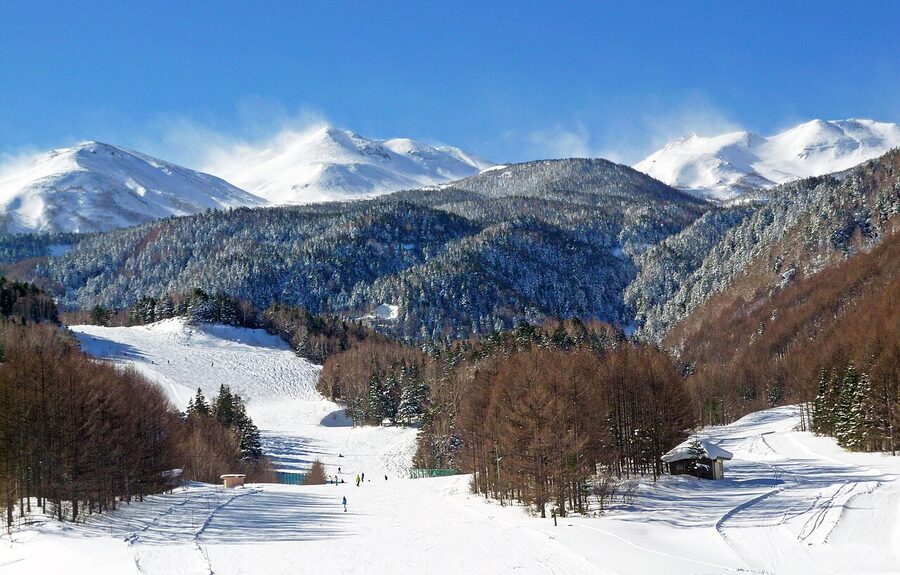
Shin‑Hotaka (新穂高), Gifu side, ropeway top station 2,156m. The shortcut. The Shin‑Hotaka Ropeway is Japan’s only double‑decker cable car and lifts you from 1,117m to 2,156m in two stages. Step out the upper station at Nishi‑Hotaka‑guchi and you’re already in the alpine zone. From here it’s a 90‑minute hike to Nishi‑Hotaka‑sanso, then a further hard climb to the summit of Nishi‑Hotaka. For travellers who want to taste the high range without committing to a multi‑day trek, this is the answer. The hot springs at the base, including Hirayu and Shin‑Hotaka itself, are part of the wider Okuhida Onsen‑go cluster, which is where most people end the day.
If you have one trip and want the iconic experience, choose Kamikochi. If you have one afternoon and want to stand in the high alpine without a hut booking, choose Shin‑Hotaka. The two are connected over the ridge, but only by the multi‑day traverse, so for a regular trip pick one valley and stay with it.
The classic: Kamikochi to Karasawa to Oku‑Hotaka

This is the route most people mean when they say they’re “going to do Hotaka”. Three days is the comfortable plan, two days is feasible if you’re fit and start very early, and the same itinerary in reverse works for descending after a Yari‑Hotaka traverse. The standard sequence:
Day 1: Kamikochi bus terminal → Tokusawa → Yokoo → Karasawa Hyutte. About 16km, 6 hours moving time, 800m of elevation gain almost all in the final 2km. The first 11km along the Azusa is flat and beautiful, and you should pace it gently because the climb from Yokoo to Karasawa via Honjo Bridge is the part where people who started fast lose their legs. Aim to leave Kamikochi by 8am to be sitting at Karasawa Hyutte by 4pm with time to drink a beer on the terrace.
Day 2: Karasawa Hyutte → Zaiten‑iwa → Oku‑Hotaka summit → Hotakadake‑sanso → return to Karasawa or push on. The crux day. From Karasawa Hyutte the trail climbs about 700m in 2.5 hours, mostly on rock with chains and a steep scree section called Zaiten‑iwa, to gain the saddle where Hotakadake‑sanso sits at 2,996m. From the hut it’s another 30 minutes of hands‑on scrambling on chained rock to the summit cairn at 3,190m. Most parties leave packs at the hut for the summit push, then descend to Karasawa for the second night.
Day 3: Karasawa → Yokoo → Tokusawa → Kamikochi. Reverse of day 1, mostly downhill, about 5 to 6 hours. Catch the return bus to Hirayu, Matsumoto or Takayama and find a bath. Don’t underestimate the descent through the boulders below Karasawa. Many minor knee injuries on this trail happen in the last hour, when concentration drops.
The Honjo Bridge ladder section
The 2km from Honjo Bridge to Karasawa Hyutte is short on the map but sustained on the ground. There are no actual ladders, but boulder fields with painted route marks and a couple of fixed chains over wet rock. If it’s snowed in late September or you’re on it in early November, this section is icy at dawn and dusk. Trekking poles help on the way up, then become a liability in the chained sections. Pack one and stash one if you’re unsure.
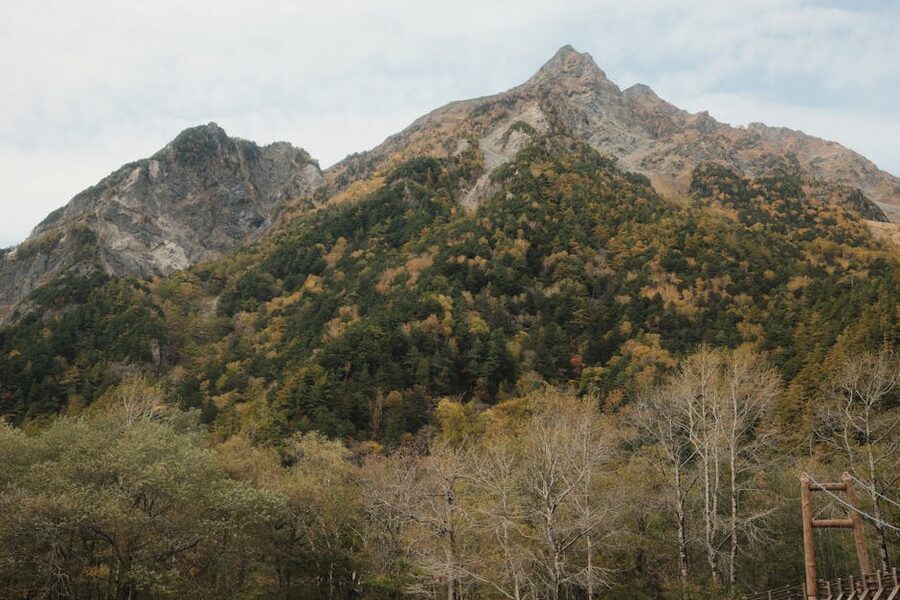
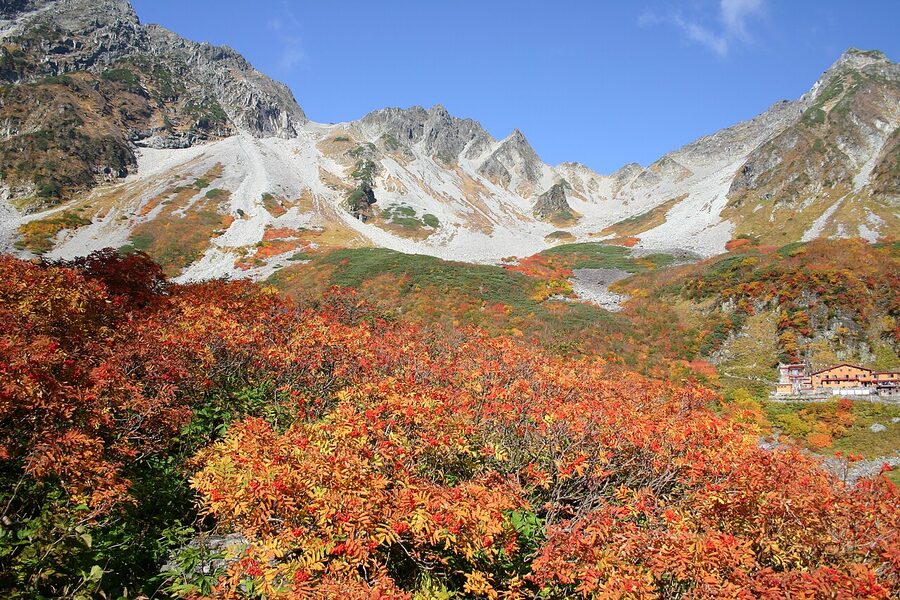
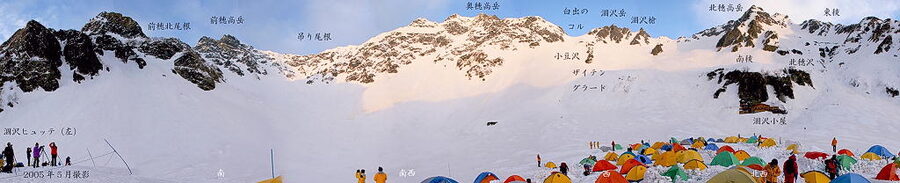
Karasawa Cirque: the autumn pilgrimage
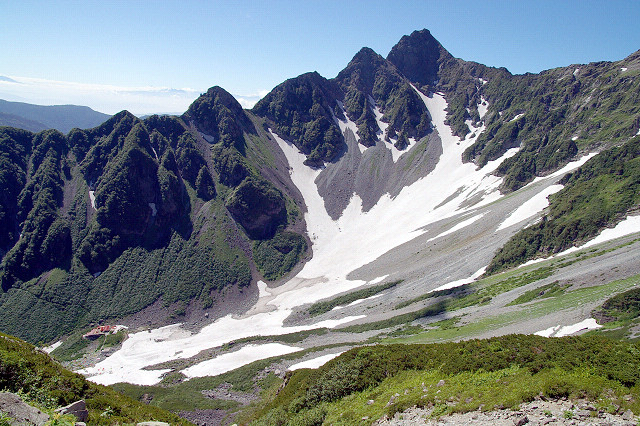
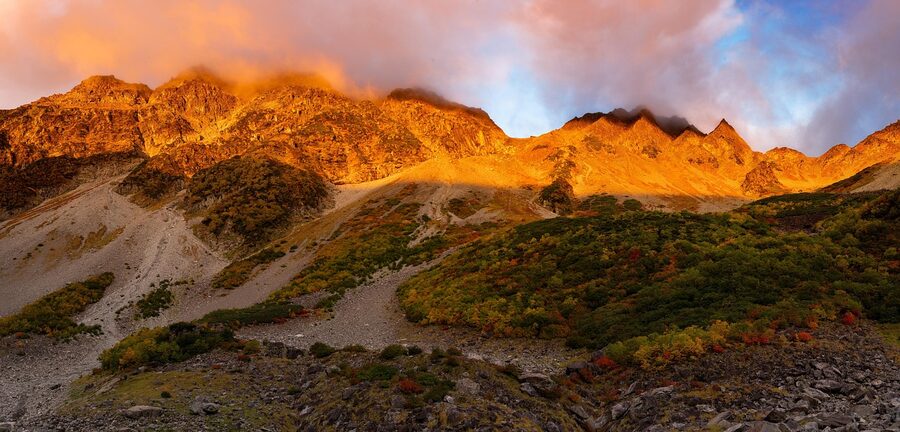
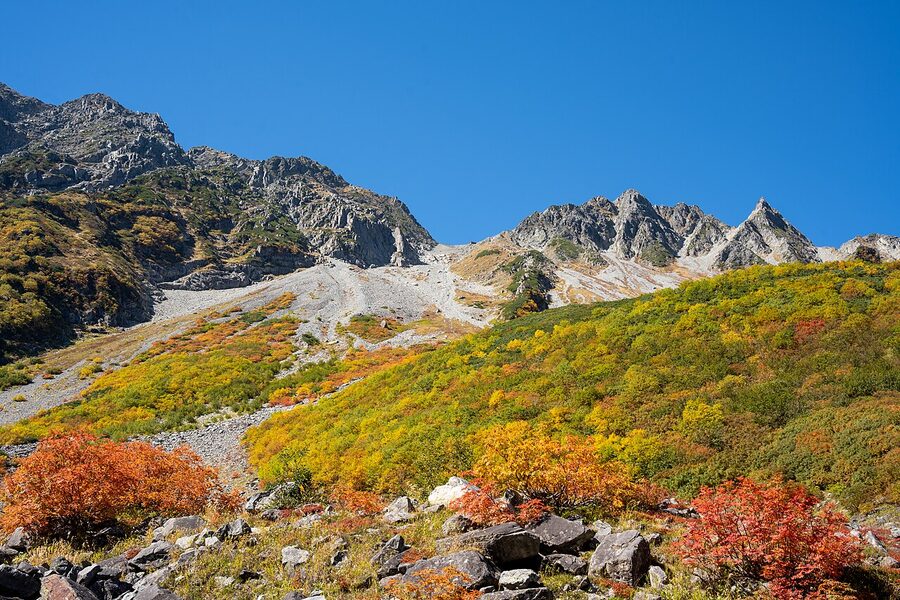
Karasawa (涸沢) is a glacial cirque scooped out of the back of the Hotaka range at 2,300m. In autumn, when the rowan and birch turn at altitude before the Tokyo cherry trees have even thought about colour, the bowl turns scarlet and gold against the granite. It is one of the three or four iconic autumn images of Japan, alongside the Kyoto temples and the Aomori apple orchards.
The colour peak is brief: roughly the last week of September into the first week of October, and the exact week shifts year to year. Yamahack and the Karasawa Hyutte website both publish daily colour reports through September if you’re trying to time it. The peak weekend is, predictably, the busiest weekend of the entire Japanese hiking calendar. Karasawa Hyutte and Karasawa‑goya, the two huts in the cirque, fill months in advance, and the tent platforms on the bowl floor host hundreds of nylon glow‑lights at dusk. The photos of the colourful tent‑city are real.
Coming for the autumn? Two practical truths. First, you need a hut booking, and both Karasawa huts insist on advance reservations and they are non‑negotiable in late September. Read our how to book a Japan Alps mountain hut guide before you start phoning. Second, the weather can flip. Karasawa has been snowed under by 30cm overnight in early October more than once. Bring real layers, not city outerwear.
Karasawa Hyutte vs Karasawa‑goya: which hut
Two huts share the cirque, about 200m apart and at virtually the same elevation. They run independently and have slightly different personalities:
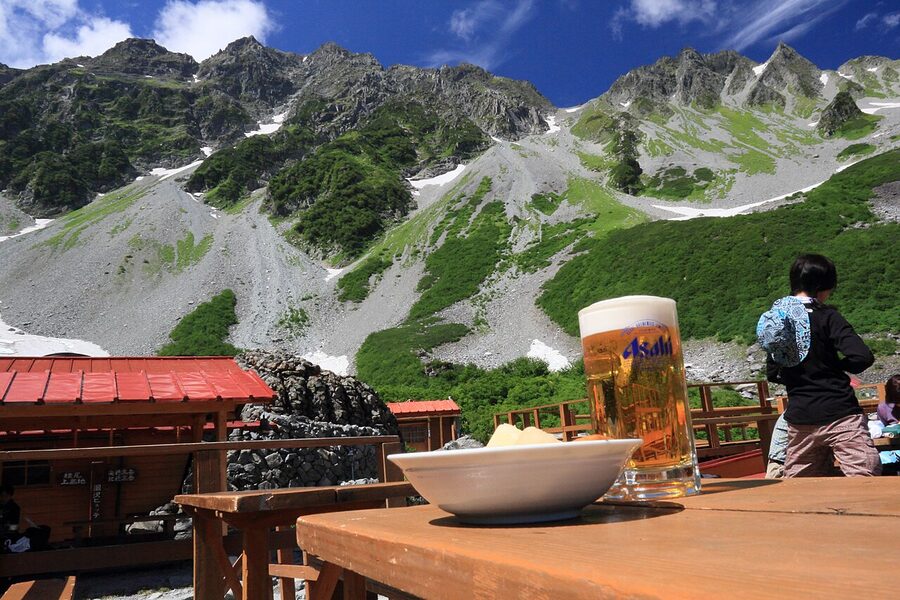
Karasawa Hyutte (涸沢ヒュッテ). The bigger of the two, founded in 1951. South‑facing terrace, popular for the late‑afternoon oden and beer ritual. The dining hall does sittings every 30 minutes at peak season because that’s the only way 400 people get fed. Bunk dorms; in October it’s two adults to a futon space, which is fine if you sleep flat and impossible if you don’t. Showers are rare; bring wipes.
Karasawa‑goya (涸沢小屋). A few minutes higher and slightly closer to the Zaiten‑iwa trail to the saddle. Smaller, slightly newer, marginally quieter. Same booking requirement, similar prices. Both serve a substantial set dinner around 5pm and breakfast bento for the early summit push. A rule that surprises first‑timers: a can of Coca‑Cola at Karasawa Hyutte costs ¥400, about three times the convenience‑store price. Everything is helicoptered in. Tip the staff in cash if anyone has carried something heavy for you.
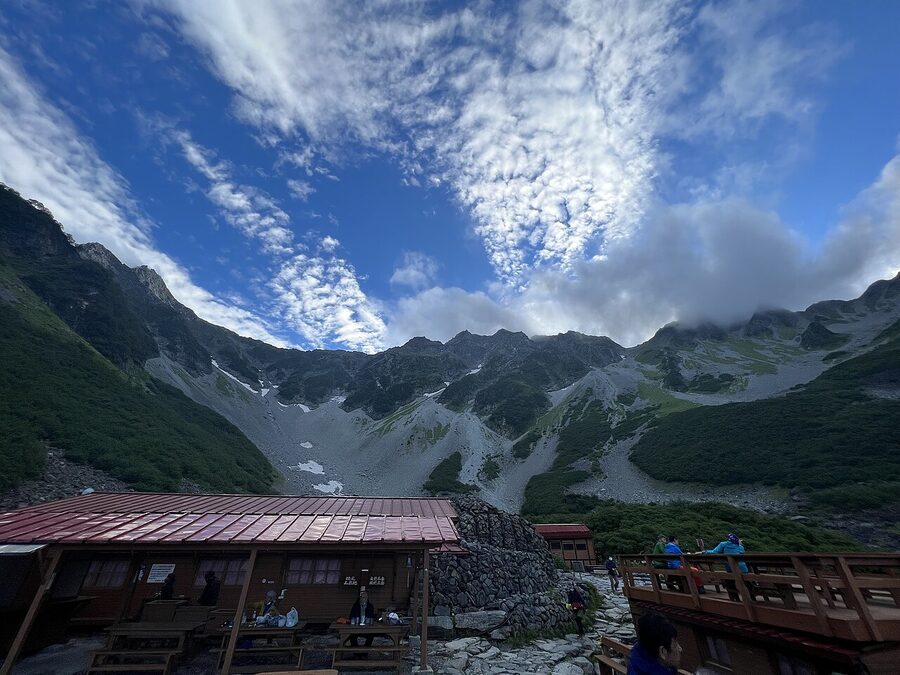
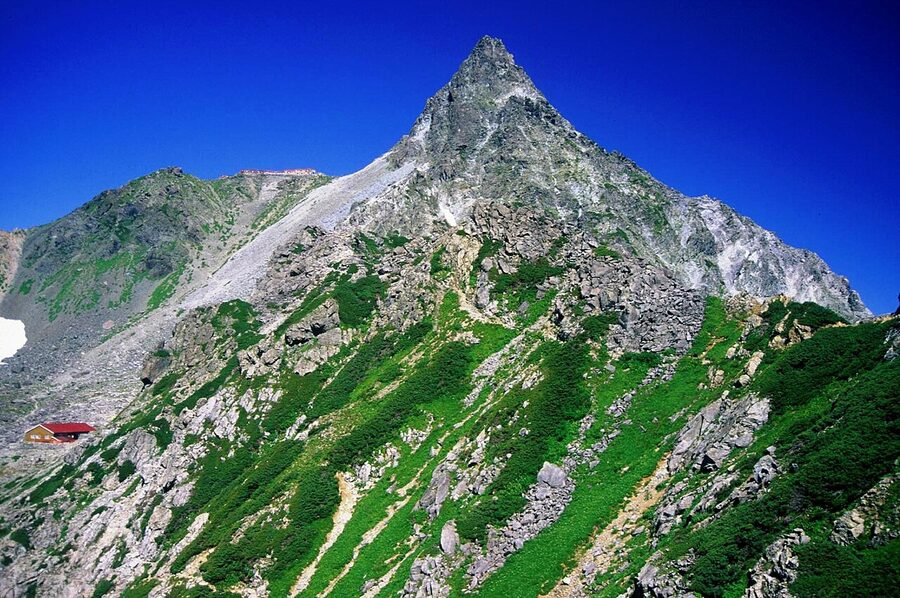
Hotakadake‑sanso and the summit push
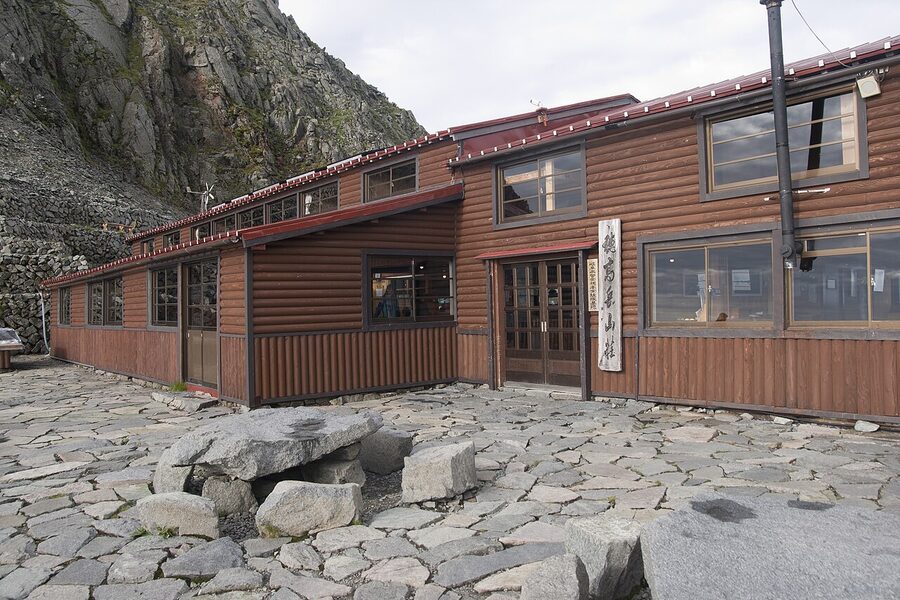
Hotakadake‑sanso (穂高岳山荘) sits at 2,996m on the saddle just north of Oku‑Hotaka. It’s the highest fully‑staffed hut in Japan and the standard base for the summit push. From the hut a chained metal staircase climbs the cliff behind, and 30 minutes later you’re on the summit cairn. Most hikers do this with a small day pack at first light from a hut night, then descend back through Karasawa.
The hut runs from late April to early November. In the shoulder weeks, especially late April to mid‑May before the snow corridor melts, you’ll need a helmet, an ice axe and crampons; the staff will turn back unprepared parties. From mid‑June to late September it’s a normal high‑altitude hike, no special gear beyond strong boots and weather layers. In the first week of November the staff start closing rooms and the kitchen winds down.
Booking is by phone or website, and they prioritise overnight stayers over day‑trippers when bunk space gets tight. If you’re planning the night here for the dawn summit push, book at least a month ahead, two months for any week containing autumn colour. The summit itself is a small platform with a stone shrine and a brass plate marking 3,190m. On a clear day Yari to the north, Norikura and Ontake to the south, the Yatsugatake range east, and Fuji over the cloud sea. People sit there a long time.
The Zaiten‑iwa staircase
The Karasawa to Hotakadake‑sanso climb is the part of the route people remember. Below 2,700m it’s loose scree and switchbacks. Above that, the trail enters the chained rock band of Zaiten‑iwa: short walls with iron pegs, exposed sections where you’re using your hands, then a final couple of metal staircases bolted into the wall. It’s signposted, well maintained, and not technical climbing. But it is exposed enough that you should be honest with yourself about heights before you commit. If a chained ladder above a 100m drop genuinely scares you, this is not your route. Take Nishi‑Hotaka instead.
The four named summits, in detail
Oku‑Hotaka‑dake (奥穂高岳, 3,190m)
Japan’s third highest peak. Reached in a half day from Hotakadake‑sanso, in a long day from Karasawa, or in three days from Kamikochi. Summit cairn at 3,190m with a small bronze plate. From the cairn, a faint use‑trail leads west and south along the Jonan ridge toward the Jandarm rock tower, which marks the start of the Nishi‑Hotaka traverse. Do not follow the Jonan trail unless you’ve planned that traverse in advance; it’s a serious technical route. For everyone else, the Oku summit is the destination, and the descent retraces the way up.
Kita‑Hotaka‑dake (北穂高岳, 3,106m)
Sometimes the most rewarding of the four. The summit hut, Kita‑Hotaka‑goya, sits literally on the peak at 3,106m. The hut’s south‑facing kitchen run by the longstanding owner does a serious curry rice. The view north from the terrace, straight down the Daikiretto to Yarigatake, is the postcard you have probably seen without knowing it. The standard approach from Kamikochi is via Karasawa, then up the Minamine ridge in 2 to 3 hours of chained scramble. The ridge is exposed and steep but not technically difficult by Daikiretto standards. North of the hut, the trail drops into the Daikiretto proper. South, the easier ridge connects to Hotakadake‑sanso in about 2.5 hours.
Mae‑Hotaka‑dake (前穂高岳, 3,090m)
The southern outpost of the range and the summit you can see most clearly from the Kappa Bridge. The standard approach is the Jonan ridge from Dakesawa‑goya, climbing the Dakesawa valley in about 5 hours from Kamikochi, with the famous “kasamatsu‑doori” pine band at 2,200m. From the hut to the summit is a further 2 hours of chain‑and‑rock scrambling. Many parties bag Mae as a side trip from a Yari‑Hotaka traverse using the Tsuribashi col. As a standalone day from Kamikochi, it’s a hard 12‑hour out‑and‑back; almost everyone splits it with a night at Dakesawa‑goya.
Nishi‑Hotaka‑dake (西穂高岳, 2,909m)
The accessible Hotaka. From the Shin‑Hotaka Ropeway upper station at 2,156m, it’s a 90‑minute walk on a maintained trail to Nishi‑Hotaka‑sanso at 2,367m, then a steep 2‑hour climb up chained rock to the summit at 2,909m. The summit ridge is exposed scrambling but manageable for fit hikers without alpine experience, in good weather, with a helmet and gloves. The Doppyo, the sub‑peak before the main summit, is the turnaround for less confident parties: same panorama, fraction of the exposure.
Beyond the summit, the route to Oku via the Jandarm pinnacle is one of the most exposed marked trails in Japan and exists in a different category of difficulty. Multiple deaths most years. Do not consider it without prior alpine scrambling experience and a helmet, harness and slings.
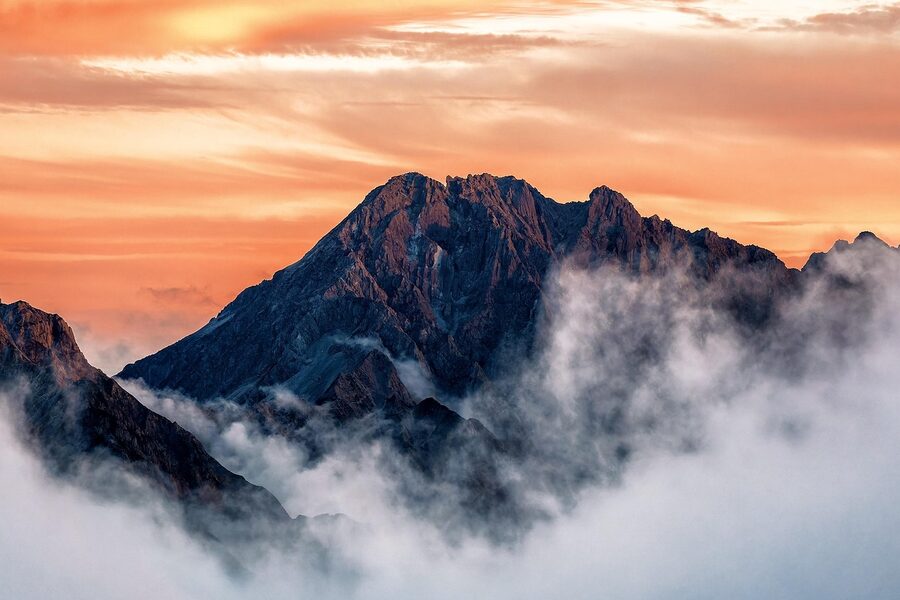
The Daikiretto: Yari to Hotaka traverse
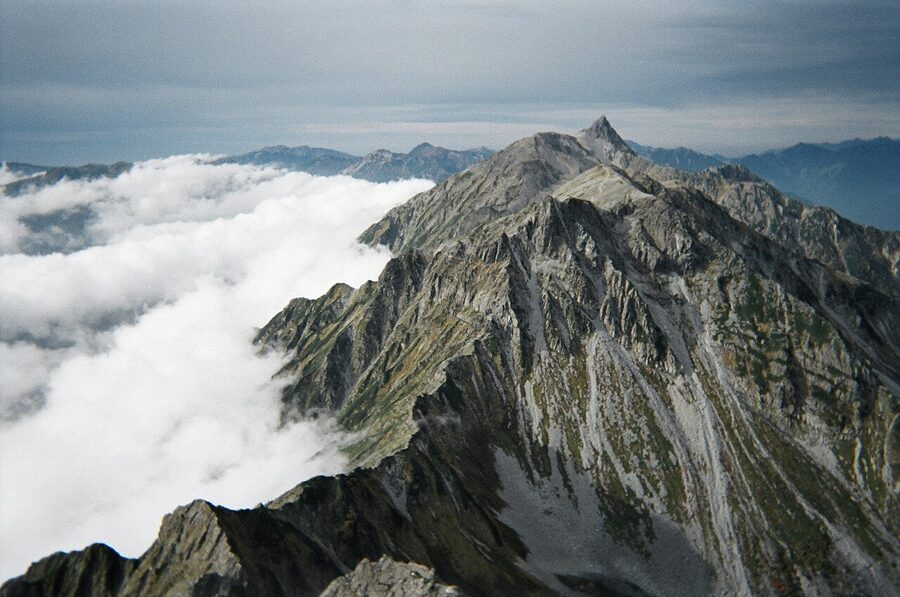
The Daikiretto (大キレット, “big cut”) is a 300m‑deep notch in the ridge between Kita‑Hotaka and Minami‑dake on the Yari side. It is one of the three named Japanese alpine “kiretto” cols, and the most famous. The route across is graded as the highest difficulty on the Nagano prefecture Yama no Grading: experienced alpinists only, with helmet, gloves, and ideally a short scramble harness for the worst sections.
The traverse from Yari to Oku via the Daikiretto is the iconic Japanese Northern Alps line. Three days out of Kamikochi:
- Day 1. Kamikochi → Yokoo → Yarisawa → Yarigatake‑sanso (8 to 9 hours). For Yarigatake’s own logistics, including the summit ladder and the booking system for the hut, see the dedicated Mt Yarigatake hiking guide.
- Day 2. Yari summit pre‑dawn → Yarigatake‑sanso → Minami‑dake‑goya → Daikiretto → Kita‑Hotaka‑goya (7 to 8 hours, the crux day).
- Day 3. Kita‑Hotaka → Hotakadake‑sanso → Oku summit → descend Karasawa → Kamikochi (8 to 9 hours).
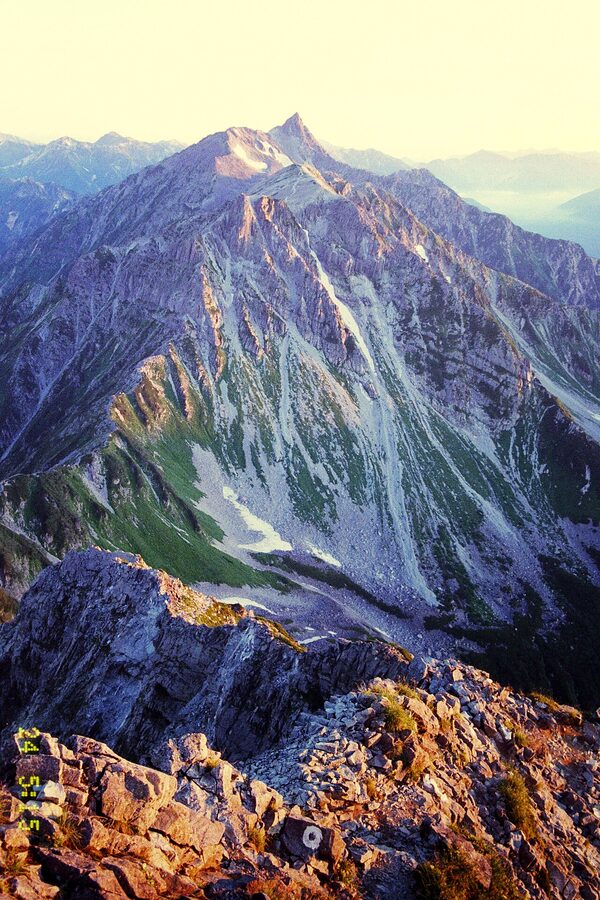
The Daikiretto itself is roughly 2.5 hours of focused movement. The crux sections are the Hi‑no‑Yagura buttress and the climb up to “Long Slab” before the Kita‑Hotaka‑goya hut comes into view. There are chains, ladders, exposed rungs, and a few short downclimbs where you’re moving on bolted iron pegs over significant drops. In good weather, with the right gear and a clear head, it is exhilarating. In wet or windy conditions, it is dangerous, and the standing advice from the hut staff is to wait it out at Minami‑dake‑goya rather than push on. People die on this ridge most years, almost always from a slip in poor conditions or a panic when caught by weather mid‑traverse.
Honestly, who should not do the Daikiretto
If any of these are true, choose another route:
- You have a real fear of heights, not just a healthy respect.
- You have never used a fixed chain or downclimbed a metal rung.
- The forecast for your traverse day shows wind over 12m/s or any precipitation.
- You’re solo and have not crossed a similar grade before.
- You can’t lose 4kg of pack weight to leave at Karasawa or Yarigatake‑sanso.
The Daikiretto rewards focus and punishes carelessness. The Yari to Hotaka traverse via the parallel Hyotandaira ridge is gentler and longer, and it’s a perfectly reasonable alternative for those who want the through‑hike but not the chasm.
The huts you’ll meet
The Hotaka range works because of its huts. There are no campsites between Karasawa and the summit, and self‑catering is the exception, not the rule. Plan your overnights around these names:
Karasawa Hyutte (涸沢ヒュッテ), 2,309m. The big one. Cirque floor. Famous terrace, full meal service, around 350 bunks. ¥14,000 per person with two meals in 2026 prices. Book months ahead for autumn.
Karasawa‑goya (涸沢小屋), 2,309m. The other one. Smaller, slightly higher up the slope, similar pricing. Same booking culture. Both have public radio for weather updates twice a day.
Hotakadake‑sanso (穂高岳山荘), 2,996m. The saddle hut. Highest staffed hut in Japan. Around 250 bunks. The summit push hut: most people stay here for the dawn climb to Oku, then descend through Karasawa. Open late April to early November.
Kita‑Hotaka‑goya (北穂高小屋), 3,106m. Sits on the summit of Kita‑Hotaka. Spectacular views, smaller capacity, around 100 bunks. Standard overnight on the Daikiretto traverse.
Mae‑Hotaka‑sanso (前穂高山荘) and Dakesawa‑goya (岳沢小屋). Used on the Mae‑Hotaka direct route from Kamikochi via the Dakesawa valley. Dakesawa‑goya at 2,170m is the standard first night; Mae itself is summited as a side trip.
Yarigatake‑sanso (槍ヶ岳山荘) and Minami‑dake‑goya (南岳小屋). On the Yari side of the Daikiretto. You’ll meet them on a through‑traverse but not on a Hotaka‑only trip.
For the booking process, telephone protocol and how to handle a no‑show, read the dedicated how to book a Japan Alps mountain hut guide. The short version: most huts take phone bookings only, in Japanese, three months ahead, and a no‑show without notice is treated as a serious breach.
When to go: season notes
The hiking calendar runs from Golden Week (late April) to early November. Within that, the windows are:
Late April to mid‑May (残雪期). Snow still on the ridges. Karasawa is a snow bowl, the route to Hotakadake‑sanso requires crampons, ice axe and helmet. Hotakadake‑sanso opens 27 April most years. One of the great Japan winter routes if you have winter alpine skills, dangerous if you don’t.
Mid‑June to mid‑July (梅雨). Rainy season. Trails are wet, leeches appear at lower elevations, the upper huts are quieter. Skip if you can.
Mid‑July to late August (夏山シーズン). Peak summer. Best weather window, longest days, all huts open and well‑stocked. Karasawa Hyutte on a sunny August Saturday is its own kind of festival. Book ahead.
Late September to early October (紅葉期). The autumn colour pilgrimage. The single most beautiful and most crowded window. Karasawa peaks first; the Daikiretto traverse can be done in this window in stable weather, but typhoons in late September are a real factor.
Mid to late October (晩秋). The colour has fallen, the crowds have thinned, the first snow is possible. Lovely ridge walking on clear days. Layer hard.
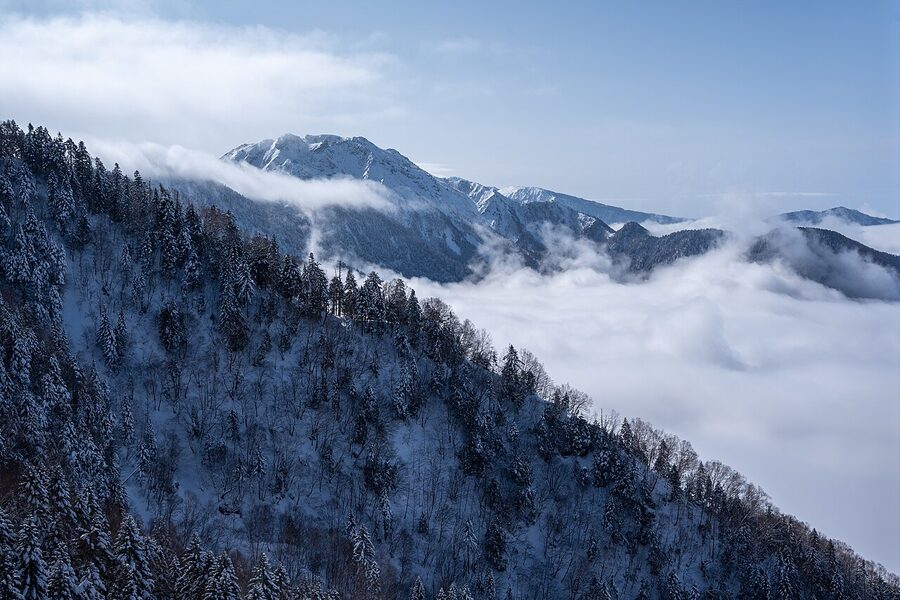
November onwards. Huts close. Hotakadake‑sanso winds down by 5 November. The range becomes a serious winter mountaineering objective and is outside the scope of this guide.
Gear: what you actually need
This is a high alpine route, not a Lake District ramble. The trail is well‑marked and the huts are luxurious by Western mountain standards, but the altitude and the exposure are real. The standard summer kit list:
- Mountain boots, B1‑grade or better, with proper tread and ankle support
- Helmet for any chained section, mandatory on the Daikiretto and strongly recommended for Zaiten‑iwa
- Light gloves (gardening type) for chains; a warm pair for the dawn summit
- Headlamp with spare batteries; many people hit the summit at dawn from the hut
- Down jacket for hut sittings and the summit; the temperature on the Oku cairn at sunrise can drop below zero in late September
- Waterproof shell, top and bottom; the weather changes fast
- 1.5L of water minimum per day; the huts sell water at altitude prices
- Trekking poles, with the option to stash one for the chained sections
- Some cash; the huts are now mostly cashless but the cans, snacks, and tipping run on coin
For altitude planning, particularly if you’re flying into Tokyo and going straight up to a 3,000m hut, read our altitude sickness in the Japan Alps guide. The risk on Hotaka is real because you sleep at 2,996m on summit night. If you’ve been at sea level a week ago, give yourself an extra rest day at Karasawa to acclimatise.
Connecting Hotaka to the rest of the range
Hotaka rarely sits in isolation in a serious trip plan. Common pairings:
Yari‑Hotaka traverse (槍穂高縦走). The iconic three‑day line via the Daikiretto, covered in the Daikiretto section above. For the Yari side of the route, including the Yarigatake‑sanso reservation system and the summit ladder, see our dedicated Mt Yarigatake hiking guide.
Shin‑Hotaka short trip + onsen. Take the ropeway to Nishi‑Hotaka, walk to the summit ridge, descend in the afternoon, and end the day in a Hirayu or Shin‑Hotaka rotenburo. The hot‑spring villages of Okuhida Onsen‑go are 15 minutes from the ropeway base.
Hotaka + Kamikochi day walks. If a summit attempt isn’t on the agenda, the Kamikochi valley offers two‑hour walks with constant views of Mae‑Hotaka and Oku from below. The Kamikochi guide covers the Tashiro Pond and Myojin loops.
Hotaka after Tateyama. Some hikers stitch a multi‑week Northern Alps loop, starting on the Tateyama‑Kurobe Alpine Route and walking south via Yari to Hotaka. It’s an old classic and still done, particularly by Japanese university clubs in summer.
The Mae and Nishi‑side approaches in detail
Mae‑Hotaka via Dakesawa
The Dakesawa approach to Mae‑Hotaka leaves Kamikochi heading west from the bus terminal, climbs steeply up the Dakesawa valley to Dakesawa‑goya at 2,170m (5 hours, 700m gain), then continues up the chained Jonan ridge to the Tsuribashi suspension bridge at the col, then a final hour to the summit. Most parties split this with a night at Dakesawa‑goya. Day‑hiking from Kamikochi to Mae and back is theoretically possible in 12 to 14 hours, but only for fit hikers prepared to start in headlamps.
From Mae, the Jonan ridge can be followed north to Oku via a chained traverse, but this is a serious route and rarely done as a casual extension. Most people who summit Mae either descend the same way, or join the Karasawa loop by traversing east via the Tsuribashi col.
Nishi‑Hotaka via Shin‑Hotaka Ropeway
The ropeway makes Nishi the only Hotaka summit reachable in a long day from a hot‑spring base, with no overnight gear, no mountain hut booking, and no 1,000m climb. The price for that convenience is that the upper third of the route to the summit is exposed scrambling, and the descent is the same in reverse. A reasonable day:
- 06:00 ropeway base station, take the first car (or a 7am one to be sociable)
- 06:30 Nishi‑Hotaka‑guchi station 2,156m, drop excess weight in the lockers
- 08:00 Nishi‑Hotaka‑sanso 2,367m, brief stop, helmet on
- 10:00 Doppyo (sub‑peak) 2,701m: turnaround for less‑confident parties
- 11:30 Nishi‑Hotaka summit 2,909m
- 15:00 back at the upper ropeway station, last car down by 16:45
Watch the cloud. The afternoon thunderstorms in summer build fast, and being on the chained ridge above the Doppyo when one arrives is unpleasant. If clouds are climbing the Hida side at 11am, turn back at the Doppyo and call it a good day.
Practical: getting to the trailheads
To Kamikochi. The valley is closed to private cars. From Tokyo: Hokuriku Shinkansen to Nagano, transfer to express to Matsumoto (or direct via Azusa from Shinjuku), then Alpico Kamikochi Line to Shin‑Shimashima, then Alpico bus into the valley. About 4 hours total. From Osaka or Nagoya: Tokaido Shinkansen to Nagoya, then Wide View Shinano to Matsumoto. The bus into Kamikochi runs roughly hourly in season.
To Shin‑Hotaka Ropeway. From Takayama Station: Nohi Bus direct to Shin‑Hotaka, about 90 minutes, ¥2,200 one way. From Matsumoto: same Alpico Kamikochi service, transfer at Hirayu, about 2.5 hours total. The ropeway runs roughly every 30 minutes and the last car down is in the late afternoon, so don’t miss it. Full transit options are in our Japan Alps access guide.
From either trailhead, allow at least one buffer day in your trip plan for weather. Hotaka in the rain is miserable and the chained sections become genuinely hazardous. If your forecast for the summit day looks wrong, sit it out at Karasawa or in a Hirayu onsen and try the next morning. The huts know this and don’t penalise sensible reschedules within reason.
Why Karasawa, in particular
Most travellers who care about Japan have seen the Karasawa autumn photo without quite knowing where it was. The bowl is the back wall of Mae‑Hotaka, gouged out by ice, then filled in with a low birch and rowan scrub that turns blood‑scarlet in the third week of September. The combination of the colour band, the granite walls of the cirque, the tent‑city floor, and the silhouette of Oku‑Hotaka above is so specific that it has spawned an entire genre of Japanese landscape photography.
It is also one of the only places in Japan where you can stand at 2,300m, eat a hot meal, and sleep at altitude without technical climbing. That combination is unusual anywhere in the world. People come back year after year. Some come for the colour, some for the company, some for the rhythm of the hut nights. There is a reason that Karasawa Hyutte’s seasonal shut‑down in early November is a date that appears on Japanese hiking calendars in red.
Pace, fitness and the honest difficulty
Honest difficulty by route:
- Karasawa Hyutte day‑hike from Kamikochi. Strenuous full day. 16km, 800m gain, no technical sections. Suitable for fit hikers without alpine experience.
- Karasawa overnight + Oku summit. Three days, real chained scrambling above 2,700m, exposure on the Zaiten‑iwa staircase. Suitable for confident hill walkers, not for absolute beginners.
- Nishi‑Hotaka summit from ropeway. Long day, exposed scrambling on the upper section. Helmet required. Suitable for experienced scramblers; turn back at the Doppyo if uncertain.
- Mae‑Hotaka via Dakesawa. Two days, sustained chained climbing on the Jonan ridge. Equivalent to a UK Grade 1 scramble in difficulty.
- Yari‑Hotaka traverse via Daikiretto. Three to four days, serious alpine scrambling, top of the Nagano grading scale. Experienced alpinists only, ideally with prior experience on a similar named col.
- Nishi to Oku via Jandarm. Technical alpine route. Multiple deaths most years. Outside the scope of recommended hiking and not covered in detail here.
If you’ve done Mt Fuji and the Kita‑dake circuit comfortably, you can do Karasawa and Oku. If you’ve only done Fuji on tarmac, build up first; the chained sections of Hotaka are a step up.
Two small things that change the trip
First: the bus into Kamikochi from Sawando runs from about 5am in peak season, and the early bus matters. If your plan is Kamikochi to Karasawa in one day, the difference between catching the 05:30 bus and the 07:30 bus is whether you sit on the Karasawa terrace at 4pm or arrive in the dark at 6pm. There’s a parking field at Sawando and a public bath next to the bus stand for the return.
Second: Karasawa Hyutte does morning bento for early starters, but you have to pre‑order at dinner. Skip this and you’ll be eating a chocolate bar at 4am in the dark, when what you actually need is a rice ball and a pickled plum to settle the stomach before a 700m climb. Order the bento. It costs about ¥1,200, and it’s the difference between a good summit morning and a bad one.
What to combine it with
A typical multi‑objective Northern Alps trip stitches Hotaka into a longer arc:
- Three days Hotaka + two days onsen. Karasawa overnight with summit push, then descend to Hirayu via Shin‑Hotaka. The Okuhida Onsen‑go cluster is the natural recovery base.
- Five days Yari + Hotaka traverse. The full Daikiretto line. End in Kamikochi, transfer to Matsumoto, eat soba.
- Hotaka + Tateyama. Hotaka on the south, then bus to Toyama and pick up the Tateyama‑Kurobe Alpine Route for high alpine sightseeing without the multi‑day pack.
- Hotaka + Kanazawa or Takayama for the down‑trip. Two cities within easy bus reach for the post‑hike soak‑and‑eat phase.
The view from the top
I keep a small jizo statue by my desk that I bought from the Karasawa Hyutte shop the morning after my first Oku summit. It cost ¥600. The owner stamped a small Hotaka seal on the back when he sold it to me, with the date and a brief good‑luck character. Stamps fade, but the trip doesn’t. I have been back four times since, and the staircase still looks taller from below than it does from the photographs.
.jpg)
_24_Oct,_2011_-_panoramio.jpg)
.jpg)
.jpg)
.jpg)
.jpg)