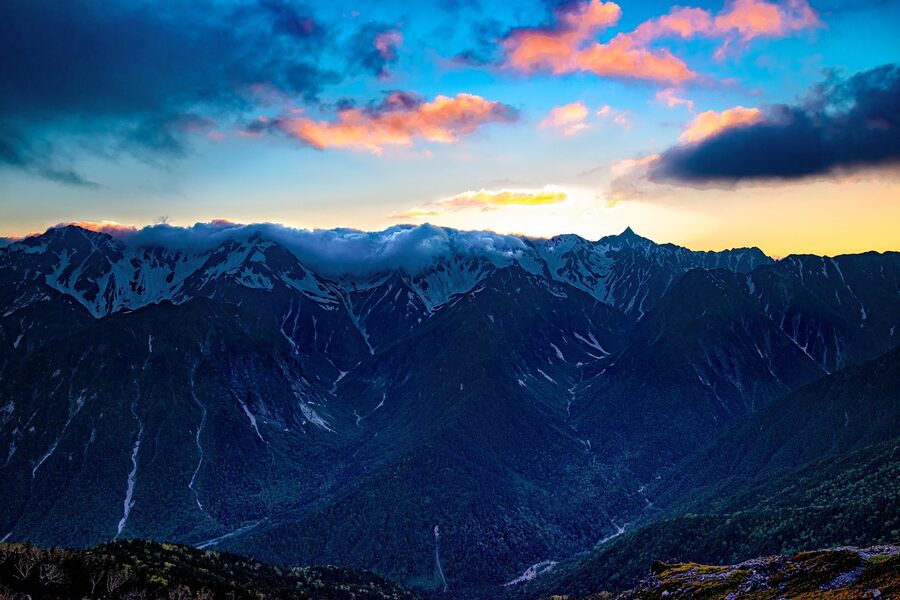
Most people who say they want to climb Mt Yarigatake have looked at one photo of the spear, decided it’s the most beautiful peak in Japan, and started Googling. Within an hour they hit the same wall: which trailhead, how many days, which hut, what the chains and ladders are actually like, whether the autumn snowstorm warning they just read still applies in July, if you have to be a climber to do this. The English internet for Yarigatake is thin, the Japanese internet for Yarigatake is enormous, and the gap between “I want to do this” and “I have a workable plan” is wide enough to swallow a fortnight of evenings. This guide is the bridge.
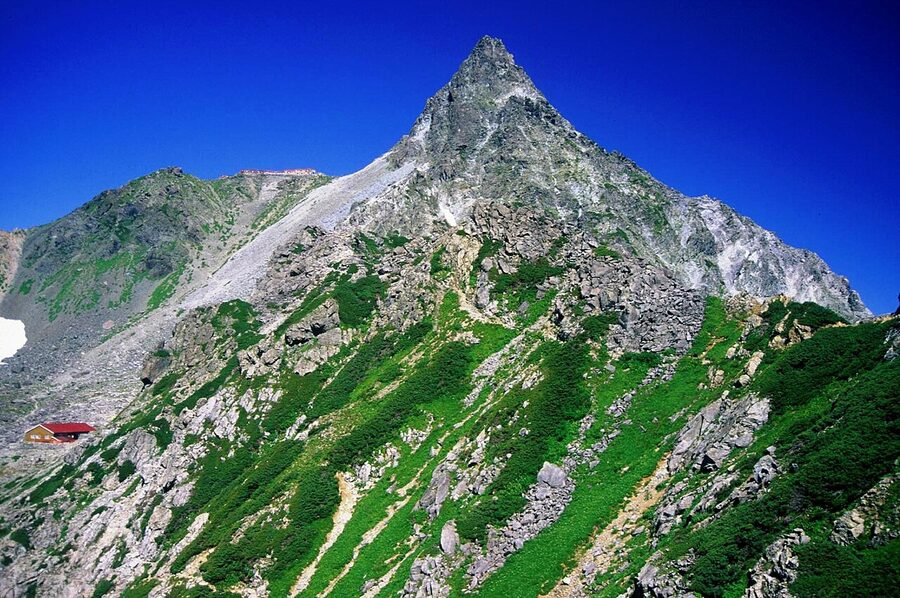
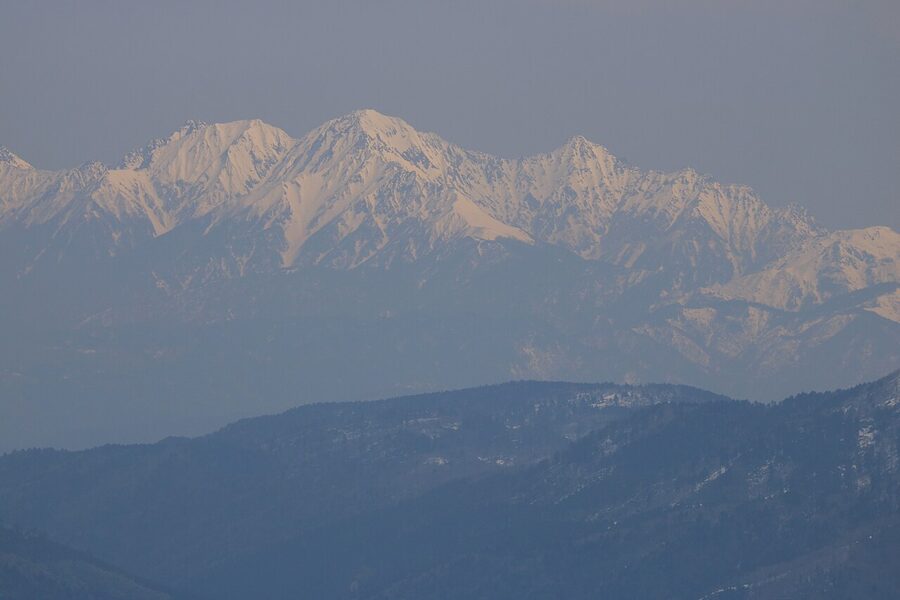
Yarigatake means “spear peak”. The shape isn’t a trick of perspective: from almost every angle on the Northern Alps the summit really is a single rock pyramid jutting out of the ridge, narrow enough at the top that only a handful of people can stand on it at once. The first ascent in 1828 was made by a Buddhist monk called Banryū, who lived in a cave below the summit and chanted for fifty-four days. The cave is still there. So is, more or less, the route he took. What’s changed is that there are now huts at every saddle, ladders bolted onto the final scramble, and a reservation system you have to navigate before you set foot on the trail.
In This Article
- What Yarigatake actually is, and why people keep coming back
- How hard is it, really
- Where it gets actually dangerous
- The four routes that matter
- Route 1: Yarisawa from Kamikochi (the classic)
- Route 2: Hidasawa from Shin-Hotaka Onsen (the shortest)
- Route 3: Omote Ginza Traverse (the long one)
- Route 4: Nishi-Kama Ridge from Shin-Hotaka via Sugorokudake
- The summit scramble itself
- The Ko-Yari, the smaller spear
- Yarigatake Sanso, and the booking system you have to deal with first
- The other huts on each route
- The Yari-Hotaka traverse and the Daikiretto
- When to go, and what changes by month
- Weather, forecasts, and the live cam
- Getting there and to each trailhead
- Getting to Kamikochi itself
- The first day from Kamikochi: what you’ll actually walk
- Altitude, fitness, and what to actually pack
- The summit reward, and what you’ll see from the top
- After the hike: down to Shin-Hotaka Onsen
- What to pair Yari with
What Yarigatake actually is, and why people keep coming back
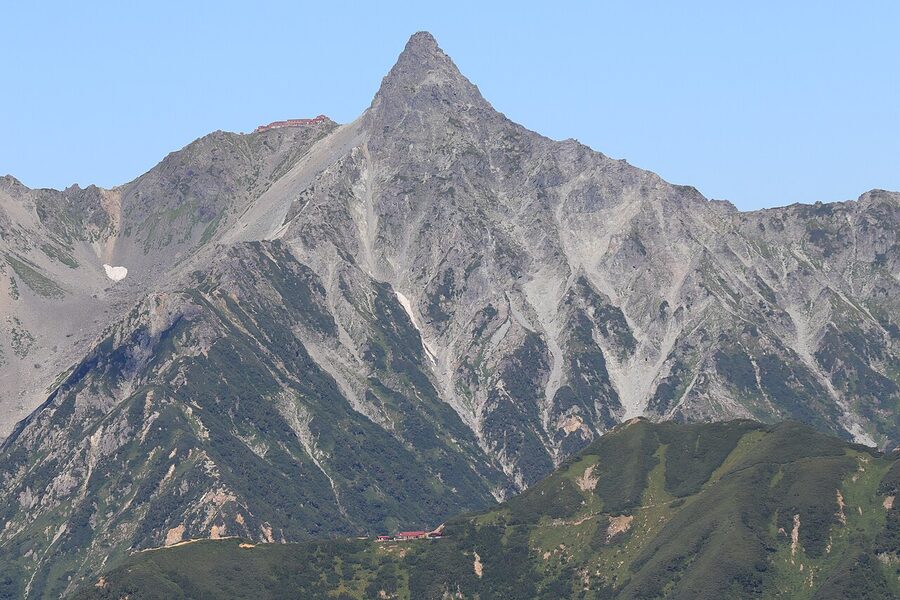
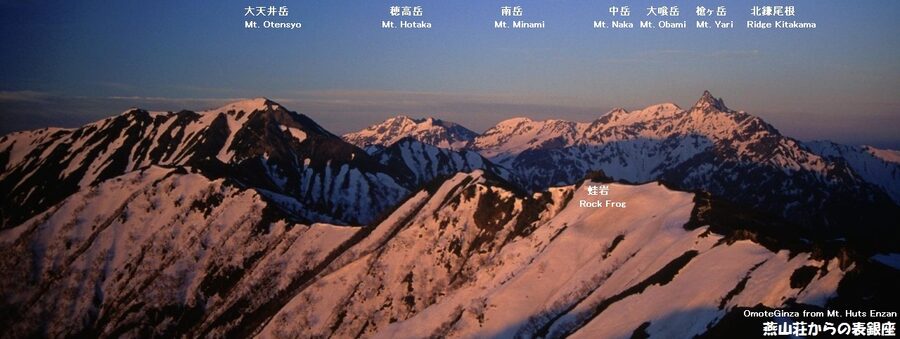
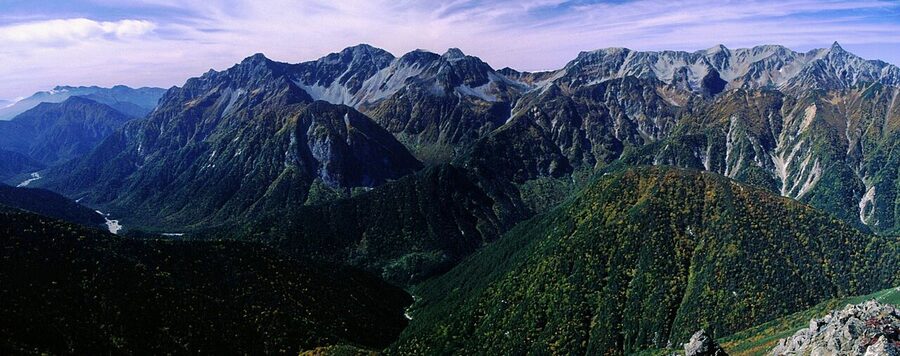
The peak sits at the southern end of the Hida Mountains, the western spine of the Northern Japan Alps. Five major ridges fan out from the saddle below the summit, and the hut at the saddle, Yarigatake Sanso, is the meeting point for almost every long traverse in the range. If you walk the famous Omote Ginza ridge from Mt Tsubakuro, you end at Yari. If you walk the Ura Ginza from Mt Mitsumata, you end at Yari. If you do the Yari-Hotaka traverse, the most coveted high-mountain line in the country, you start at Yari. The mountain isn’t just a destination, it’s the hub the whole alpine system organises itself around.
It’s also the fifth-highest mountain in Japan, after Fuji, Kita-dake, Oku-Hotaka, and Aino-dake, and the most photographed peak in the country after Fuji. Hyakumeizan author Fukada Kyūya put it in his hundred famous mountains, which is the closest thing Japan has to an official bucket list, and that listing alone drives a steady flow of older Japanese hikers up the spear every summer. The combination of cultural pull, technical interest, and visual recognisability is unusual: there are higher mountains, and harder mountains, and prettier valleys, but very few peaks combine all three the way Yari does.
How hard is it, really
The Nagano Mountain Grading System rates the standard Yarisawa route from Kamikochi as physical level 8 on a scale of 10, technical level C on a five-step scale from A to E. That puts it firmly in “intermediate hiker, two-night minimum” territory. You don’t need rope skills or rock-climbing experience for the standard routes. You do need to be comfortable with sustained 1,400m climbs in a single day, sleeping at altitude, walking on loose volcanic scree, and the final 200m of the summit, which is a near-vertical scramble assisted by chains and two long ladders.
The reality is that the difficulty is split unevenly between the approach and the summit. The walk from Kamikochi to Yarigatake Sanso is a slog: long, often hot, with the steep work concentrated in the last three hours of day two. By the time you reach the saddle you’ve gone from 1,500m to 3,060m in roughly a day and a half. The summit scramble that everyone fixates on takes thirty to forty minutes round trip and, while it’s exposed and serious, it’s not technical. The hardest part of climbing Yarigatake, for most people, is the second-day grind up the upper Yarisawa, not the rocks at the top.
You can read a useful first-person account on Ridgeline Images, which rates it 5/5 difficulty and notes the trail is “free of any real hazards apart from the final push to the summit”. That tracks. Three things will defeat people on the standard route, in this order: bad weather (always), pace and fitness (often), and the ladders if you have a real fear of exposure (occasionally). Pure climbing skill, almost never.
Where it gets actually dangerous
Yari has a known accident profile, and it concentrates in two places. The first is the Yari-Hotaka traverse via the Daikiretto, which is covered separately below: that ridge has fatalities most years and shouldn’t be done by anyone who doesn’t already know it’s within their range. The second is the Kita-Kama Ridge, which approaches the summit from the north along an exposed knife-edge. It’s a true alpinists’ line, technically demanding, with no fixed protection. If you’re reading this guide to plan your trip, the Kita-Kama isn’t for you, and the rest of the article skips it. The standard routes, treated with respect, are not death traps.
The four routes that matter
There are five trailheads from three different valleys, and the official Yarigatake Sanso group counts six named courses. For practical purposes you’re choosing between four. Pick based on what you want from the trip, not on which one is cheapest or shortest, because the differences in atmosphere are enormous.
Route 1: Yarisawa from Kamikochi (the classic)
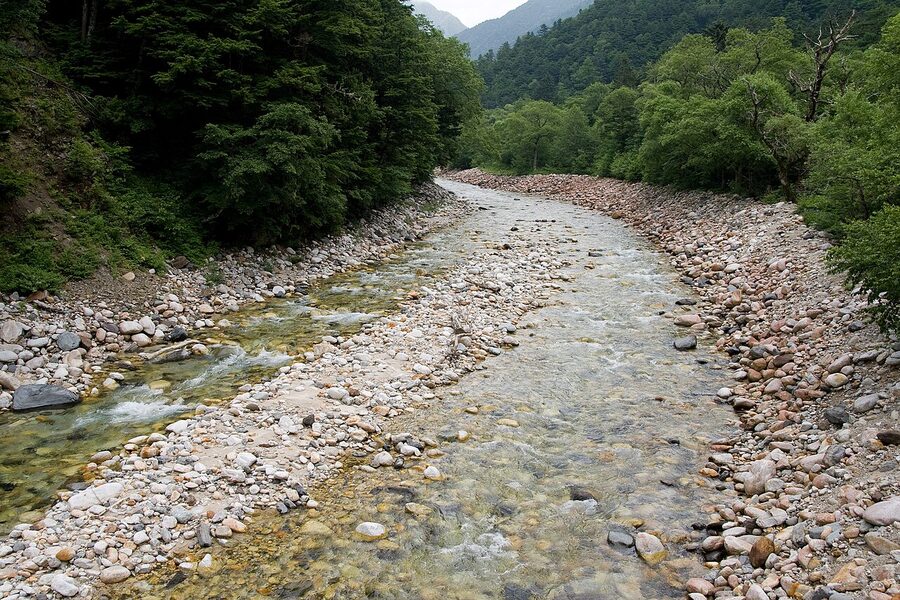
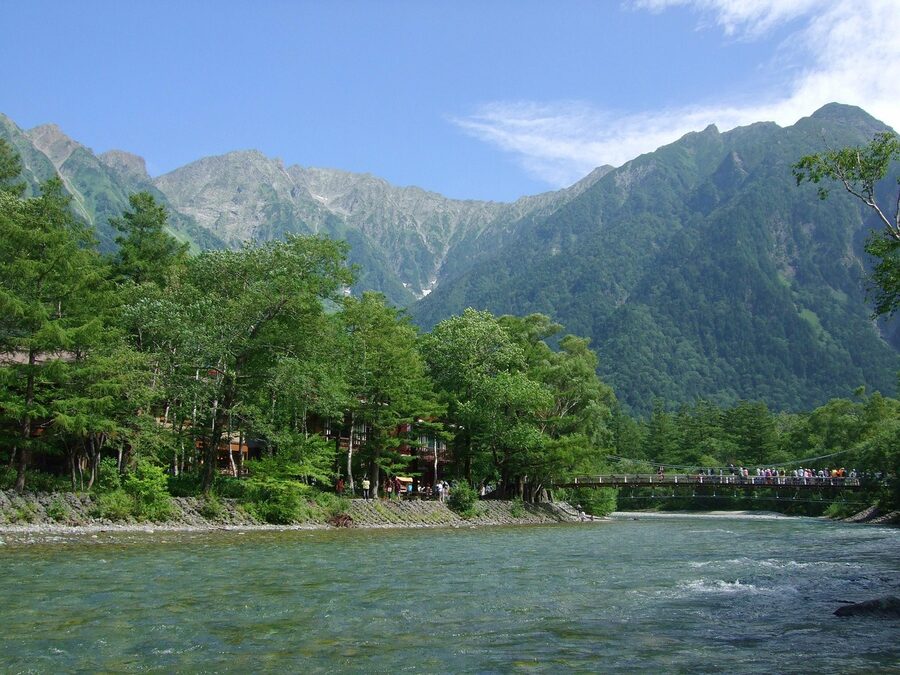
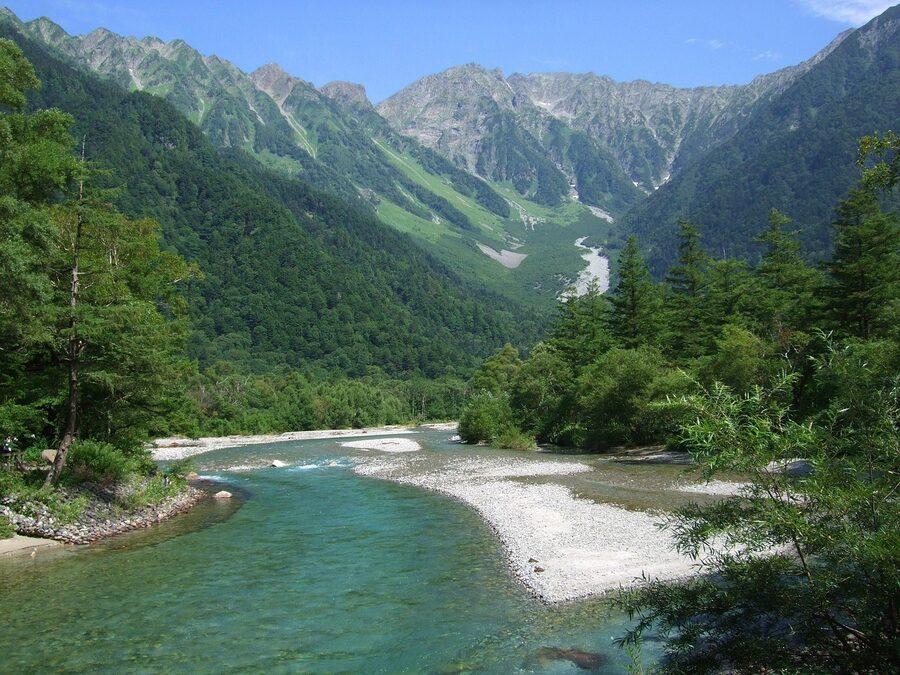
This is the route 70% of climbers take, for one good reason and a few smaller ones. The good reason is that you start at Kamikochi (1,500m), one of the most beautiful river valleys in Japan, walk gently along the Azusa River for fifteen kilometres of essentially flat ground to reach Yarisawa Lodge, and only then start climbing in earnest. The total trip is two nights, three days, with the elevation distributed kindly: 540m on day one, 1,400m on day two, then everything back down on day three. Distance for the round trip is 41km.
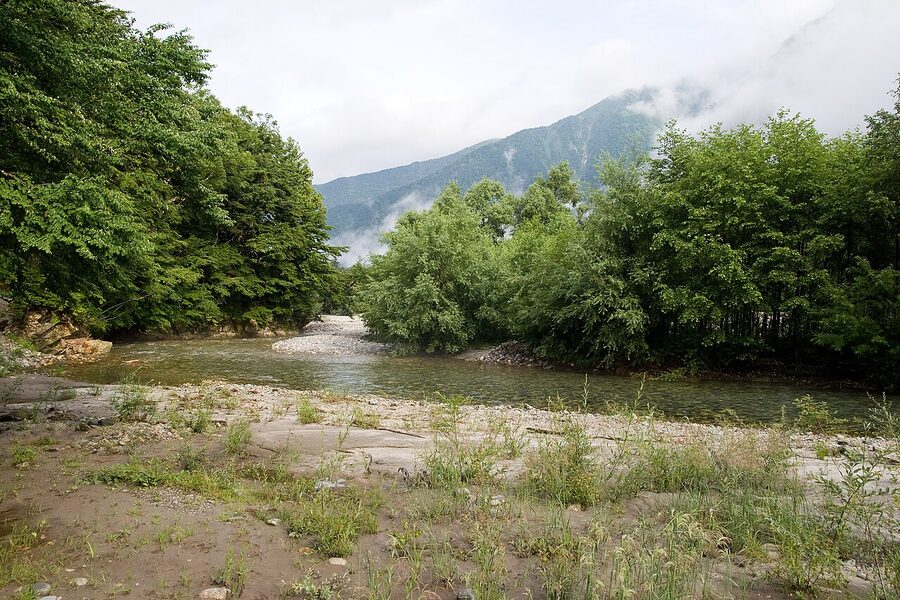
The route in summary: from Kamikochi Bus Terminal you cross Kappa Bridge, follow the Azusa upstream through Tokusawa (3 hours) and Yokoo (4.5 hours), then leave the touristy part behind and climb gradually for another 90 minutes to Yarisawa Lodge at 1,820m, where most parties spend the first night. Day two is the hard one: leave Yarisawa around 06:30, climb the upper Yarisawa snow tongue, pass Banryū’s Cave at the 2,500m mark, then grind up the switchbacks past Sessho-goya hut to Yarigatake Sanso at 3,060m. Most people arrive between 13:00 and 15:00, drop their packs, and climb the final 120m to the summit before dinner. Day three is the same trail in reverse, getting back to Kamikochi by mid-afternoon.
Why people pick it: the long valley walk gives you time to acclimatise, the views during day two are spectacular as you rise above the treeline, and the route is the safest in poor weather because almost all of it is sheltered. Why people skip it: the day-one walk is repetitive if you’ve done Kamikochi before, and the trail is busy in the second half of August.
Route 2: Hidasawa from Shin-Hotaka Onsen (the shortest)
The Hidasawa route, from Shin-Hotaka Onsen on the Gifu side of the range, is the shortest line to the summit at about 30km round trip. It’s also the one with the most elevation gain per day because there’s no flat valley walk: from the moment you leave the Shin-Hotaka bus stop you’re climbing, first on a forestry road past Hotakadaira-goya for 90 minutes, then on a proper trail up the Hidasawa gully system to Yaridaira-goya at 1,990m. That’s day one, about 7 hours. Day two takes you up the brutal Hida Nokkoshi switchbacks to the saddle, summit, and back to the hut. Day three retraces the descent.
Pick it if you want quiet. There are typically three or four times fewer people on the Hidasawa than on the Yarisawa, and you spend most of day one in deep forest with the river running alongside. Skip it if you’re not confident on day-one elevation gain: there’s no easy bail-out option once you’ve committed.
Route 3: Omote Ginza Traverse (the long one)
The Omote Ginza is the most beautiful approach to Yari and one of the great long-distance walks in Japan. It starts at Nakabusa Onsen on the eastern flank of the range, climbs the famously steep Gassen-one ridge for four hours to Mt Tsubakuro (2,763m), and then traces the entire spine of the Northern Alps south for two days to Yari. Total time is three nights, four days. Total distance is about 42km but the elevation profile is completely different from the valley routes: you spend three full days at altitudes between 2,500m and 3,000m.
From Enzanso (night one) you walk south along an open ridge to Daitenjō Hyutte (night two), then continue on the Higashi-Kama ridge with its three-step ladder section to Hyutte Nishi-Yari, and on day three drop into the saddle below Yari and climb back up to Yarigatake Sanso. The fourth day descends the Yarisawa to Kamikochi. The route name “Omote Ginza” literally means “front-side high street”: it’s the showcase ridge of the Northern Alps and the views into the Yari massif as you approach are extraordinary.
Pick it if you want the iconic Northern Alps experience and have four days to spare. Skip it if you’re not used to multi-day ridge work at altitude, or if the forecast for any one of those four days is poor: there’s nowhere to escape to once you’re on the ridge.
Route 4: Nishi-Kama Ridge from Shin-Hotaka via Sugorokudake
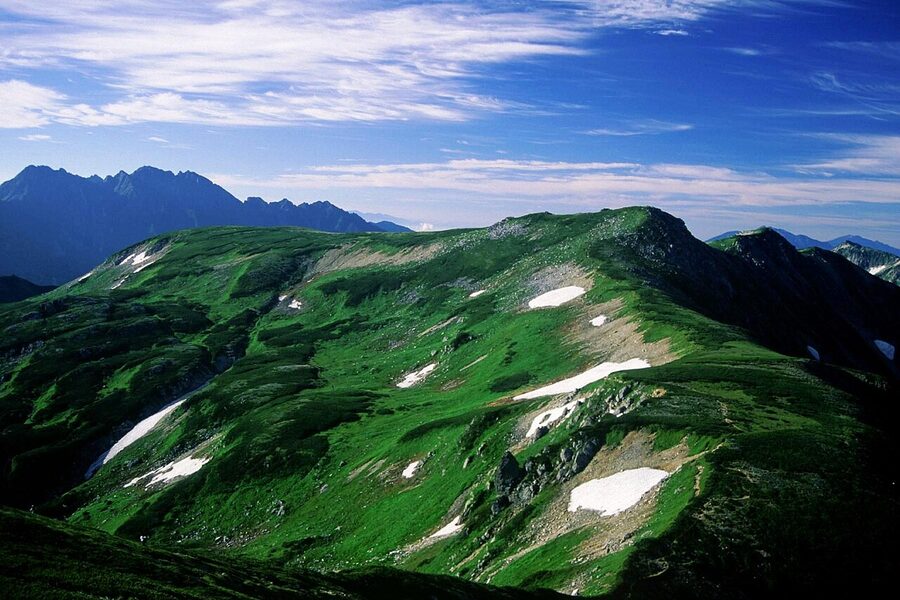
The Nishi-Kama is the western traverse: from Shin-Hotaka Onsen you walk past Wasabidaira-goya, climb the Kogata Shindo to Sugoroku-goya hut at 2,500m for night one, then traverse the Nishi-Kama ridge with its alpine flower fields all day to reach Yari on day two. Total 35km. It’s the longest of the four standard routes, with the gentlest summit-day approach: by the time you reach the chains, you’ve already been at altitude for a full day, which makes a real difference.
Pick it for the flowers in late July, for the relative quiet, and if you want a low-stress acclimatisation profile. Skip it if you’re tight on time. There’s no shortcut.
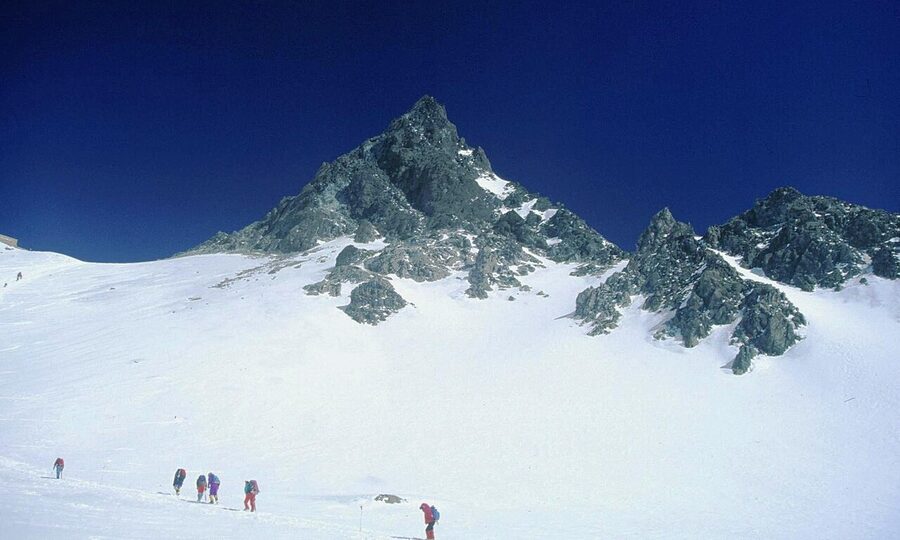
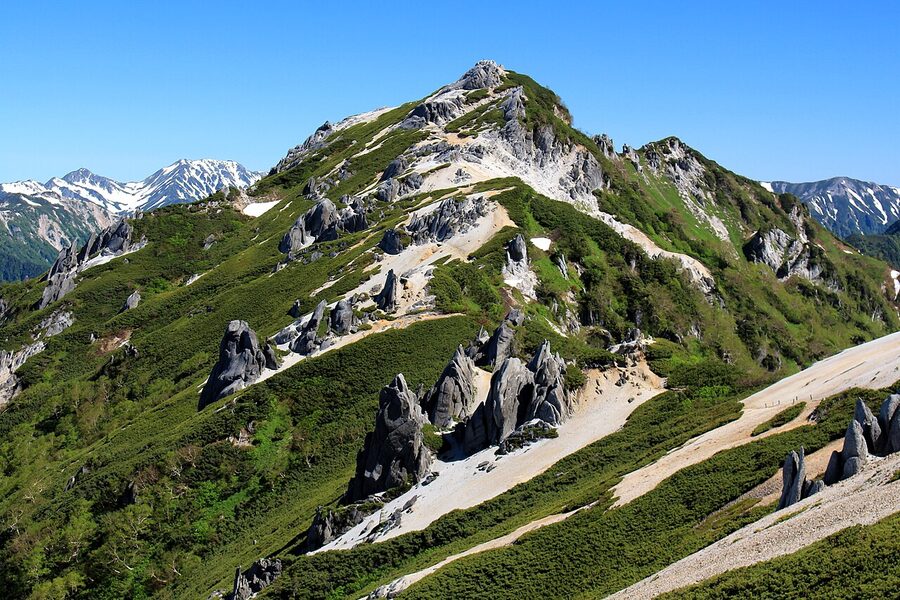
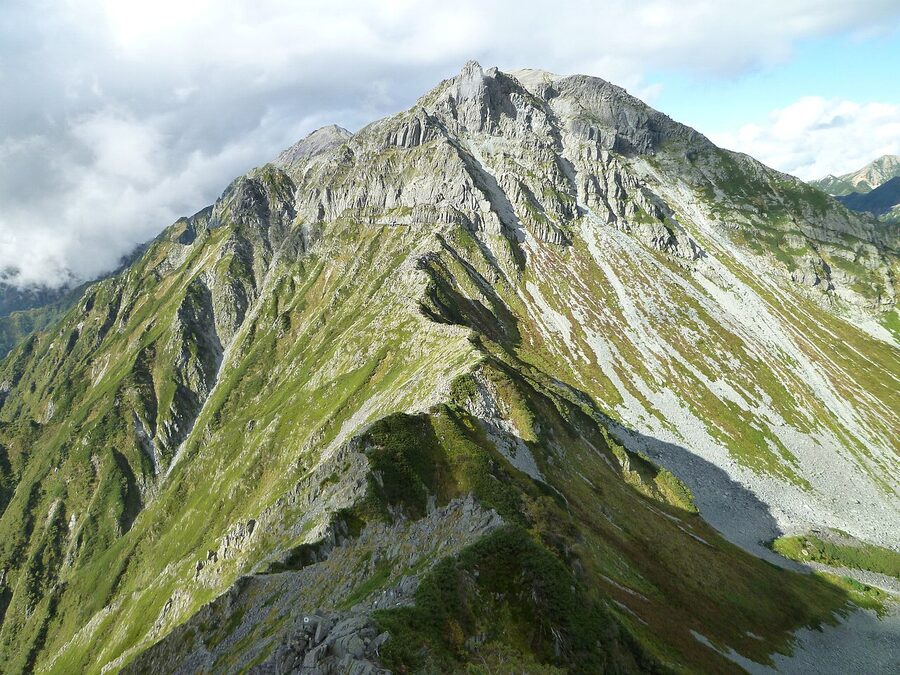
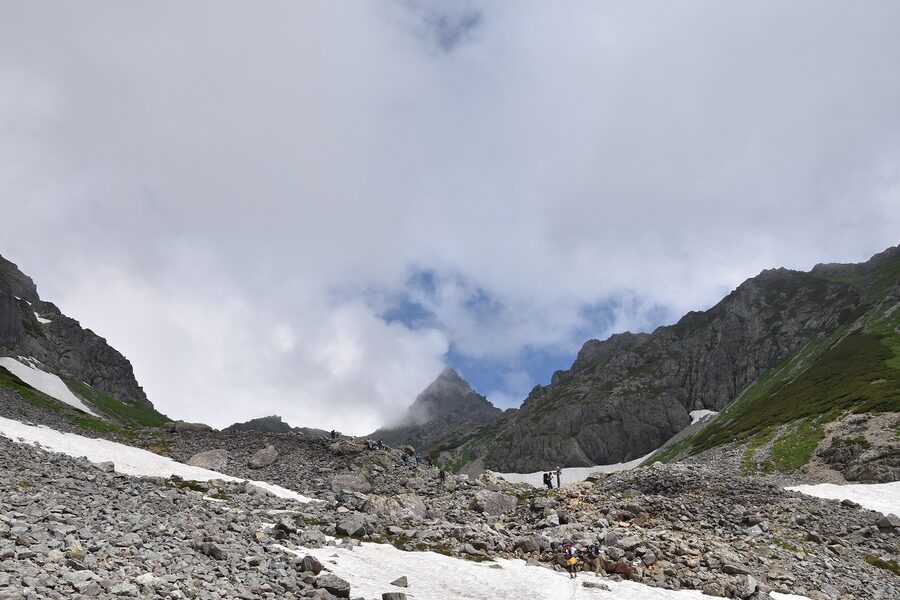
The summit scramble itself
From Yarigatake Sanso to the summit is 200 vertical metres of fixed-rope scramble. The route splits into separate ascending and descending paths for most of the way, which keeps things moving in both directions, and there are clear painted O and X markings on the rock telling you where to go. Three things to know going in.
First, you’re going to want a helmet. The hut rents them for ¥500 a head and most Japanese climbers wear one, both as protection against rocks knocked loose by the people above you and because Nagano Prefecture officially recommends helmets for the spear. If you bring your own, that’s fine; if you don’t, rent one without thinking twice. A loose stone falling 50m onto an unprotected head ends the trip in the worst possible way.
Second, the climb takes 30 to 40 minutes one way in normal conditions. On busy August weekends the queue at the chains can stretch the round trip to two or three hours: if you arrive at the saddle on a bank-holiday weekend, climb the spear before dinner, not after. The early-morning summit at 04:30 is also less crowded, and the sunrise from the top is one of the best in Japan.

Third, the crux is the two vertical iron ladders just below the summit. The lower one is roughly five metres, the upper one is about three. They’re old, they look it, and on calm days they’re completely fine. On windy days they’re psychologically harder than they are technically. People have been heard to say the descent ladder feels “loose”, which is partly true and partly a function of moving down a vertical iron rung in alpine air. Three points of contact, breathe, no rush. The relief on people’s faces when they step off the top of the upper ladder is a giveaway: a lot of climbers were more nervous than they let on, and the view rewards them anyway.
The Ko-Yari, the smaller spear
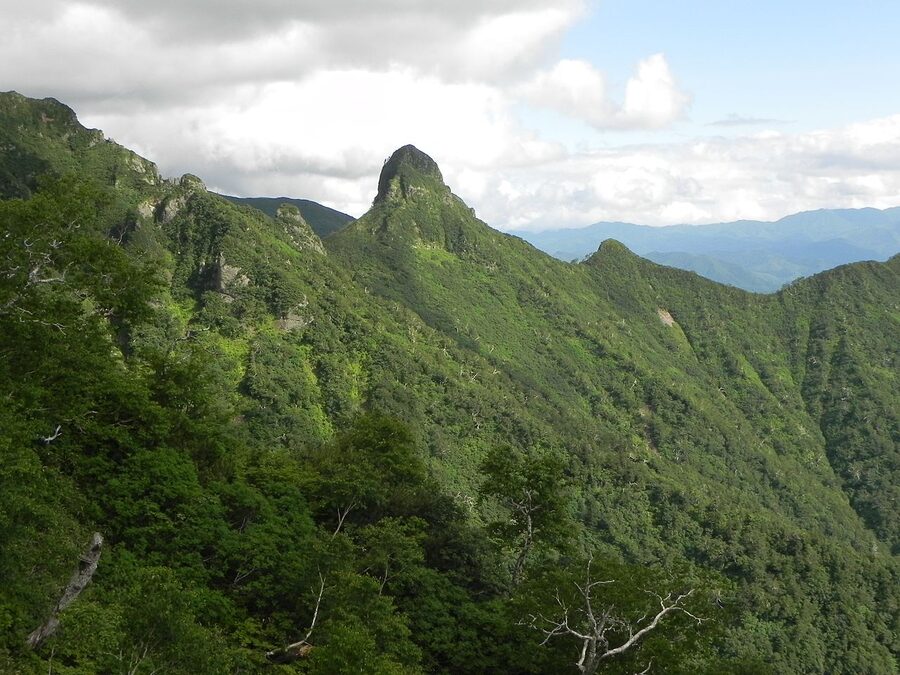
If you climb Yari you’ll see Ko-Yari, the smaller spear thirty metres west of the main summit. Don’t try to climb it. Ko-Yari is a free-climbing route, the rock is rotten, and it’s closed to general hikers. There’s no shame in pointing at it from the top of Yari and walking back down.
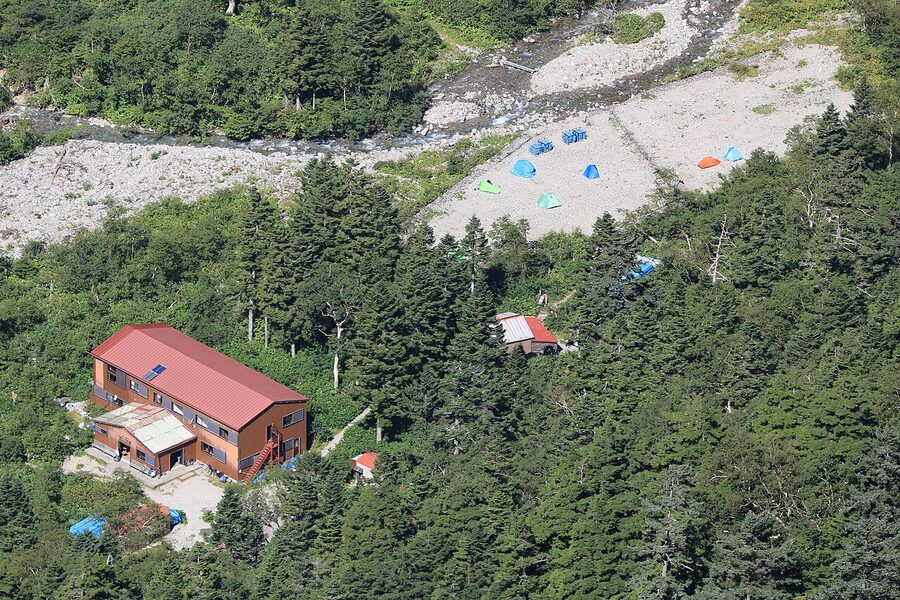
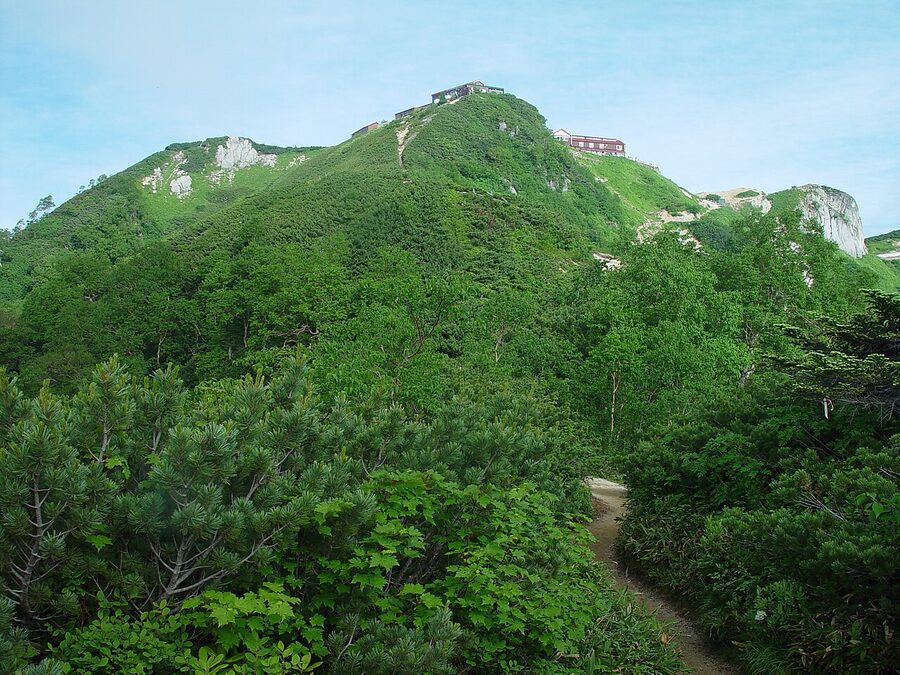
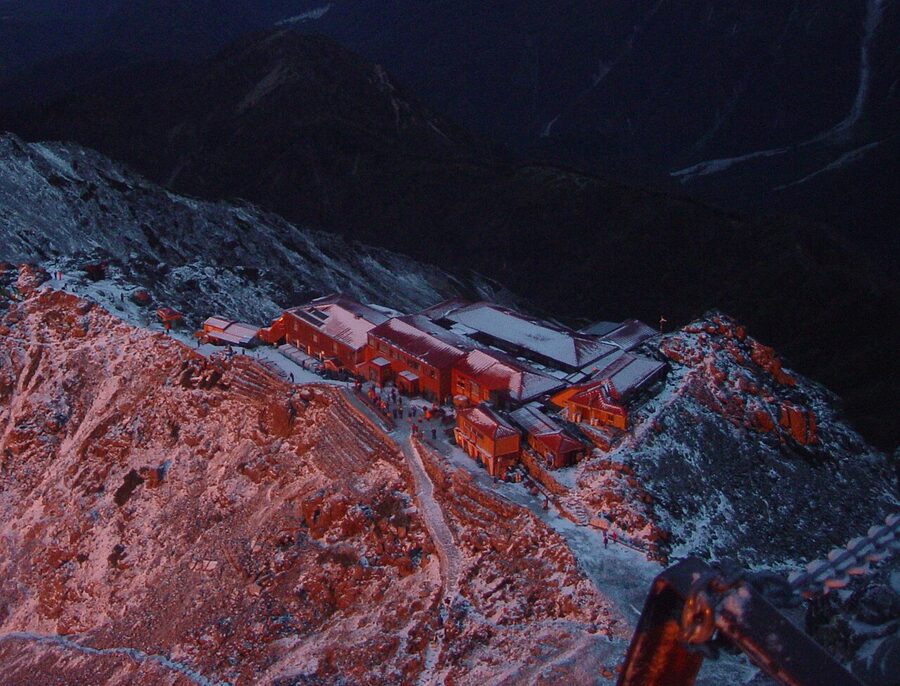
Yarigatake Sanso, and the booking system you have to deal with first

You can’t walk up to Yarigatake Sanso and ask for a bunk. Reservations have been mandatory since 2020 and the booking system is the single most logistical thing about the whole trip. Bookings open in late April for the season, fill up fast for August weekends, and are taken via the Yarigatake Sanso group’s own website, which exists in Japanese only. The good news is that the form is short and Google Translate handles it well; the better news is that the same booking system covers Yarisawa Lodge and Sessho-goya, so you can book your full route in one transaction.
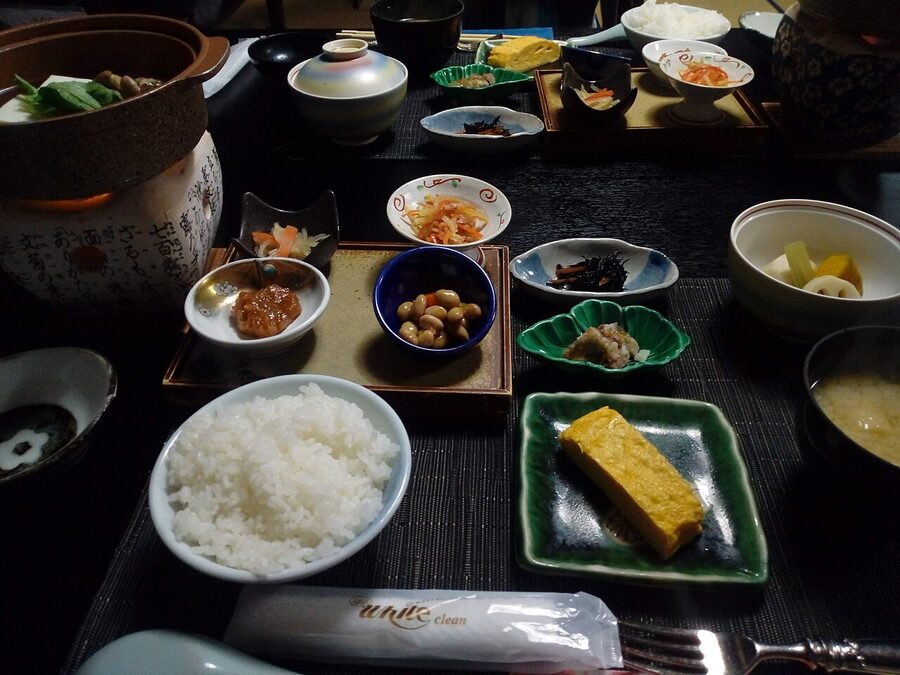
Costs as of the 2025 season: ¥15,500 per person per night for a bunk plus dinner and breakfast. An additional ¥1,500 to ¥2,000 buys a bento for lunch on the trail. Tent pitches are ¥2,000 per tent, no meals; you can buy a hot meal at the hut for an extra ¥3,000 to ¥4,000 if you change your mind on arrival. Cards aren’t accepted at any hut on the route, so bring cash for the full duration of your trip.
The hut itself is one of the largest in the Northern Alps, with a 650-person capacity in peak season and a dining hall that can seat several hundred at once. Bunks are dormitory style on tatami platforms, with futons and warm blankets provided. Drinking water is free, refilled from melt-water springs around the saddle. There’s a small canteen open through the day for ramen, curry, and beer. Power outlets are limited and reserved for medical equipment: bring a power bank, and don’t expect Wi-Fi.
If Yarigatake Sanso is full on your dates, the fallback is Sessho-goya, twenty minutes below the saddle on the Yarisawa side. It’s smaller, less convenient for the summit, but the staff are friendlier and you can still climb the spear in the morning. Booking the same way through the Yarigatake Sanso group site.
The other huts on each route
If you walk a multi-day route, you’ll need to book each night separately. The relevant huts in each direction:
- Yarisawa side: Yarisawa Lodge (1,820m, classic night-one stop), Sessho-goya (3,030m, smaller, useful as overflow), Yarigatake Sanso.
- Hidasawa side: Hotakadaira-goya (1,760m, often skipped), Yaridaira-goya (1,990m, the night-one stop), Yarigatake Sanso.
- Omote Ginza: Enzanso (2,704m, night one), Daitenjō Hyutte (2,650m, night two), Hyutte Nishi-Yari (2,684m, optional night three), Yarigatake Sanso.
- Nishi-Kama: Sugoroku-goya (2,500m, night one), Yarigatake Sanso.
All of them are run by experienced groups and all of them can be booked the same way. Read the broader Japan Alps mountain hut booking guide if you want a step-by-step on the reservation process and the etiquette inside the hut.
The Yari-Hotaka traverse and the Daikiretto
The traverse from Yarigatake to Mt Hotaka along the Daikiretto is the most coveted alpine line in Japan. It’s also one of the most dangerous standard hiking routes in the country. The Daikiretto, literally “great cut”, is a 300m-deep notch in the ridge between Minamidake and Kita-Hotaka where the rib of the mountain narrows to centimetres and the route descends and re-ascends on chains and pegs. Falling here is fatal. The death toll on the Daikiretto is in the single digits most years, but it is consistent.
The standard direction is from Yari south to Hotaka, because the bigger of the two chained drops at Kita-Hotaka is much easier as a descent into the cut than a climb out of it. From Yarigatake Sanso it’s typically two days: a long day to Minamidake-goya or Kita-Hotaka-goya, then a second day across the cut and over Oku-Hotaka to either Hotaka-dake-sanso or down to Karasawa. Many parties take three days.
If you’re asking yourself whether the Daikiretto is for you, the answer is probably no. The route demands sustained focus over multiple hours of exposed scrambling, comfort with vertical chained sections that have nothing below them, and the experience to make the call to turn around if cloud or wind comes in. People who have done the Hotaka chains and the Tsurugidate route already are good candidates. People for whom Yari itself is the biggest scramble they’ve ever done are not. The full Mt Hotaka route is covered in the dedicated Mt Hotaka hiking guide.
When to go, and what changes by month
The summer season is short. Yarigatake Sanso opens in late April and closes around the start of November, and the safe hiking window is much narrower than that.
Late April to mid-June. The hut is open, the trail is buried in snow, the route is for experienced spring-snow climbers only. Crampons and ice axe are mandatory. The Yarisawa snow tongue is unstable and avalanches are a real risk. Skip unless you know the area in winter.
Mid-June to early July. The rainy season hits Honshu. Trails are open but you’ll get wet, the upper Yarisawa snowfields are still extensive, and visibility is often zero. Crampons are useful at the upper crossings even into early July. The hike is doable but the views, which are the point, are unreliable.
Mid-July to mid-August. Peak season, peak weather, peak crowds. Schools are out from late July, the alpine flowers are at their best in the second half of July, and the huts are fully booked weeks in advance for any weekend in August. Day temperatures at the saddle are around 15 to 20°C, nights drop to single digits.
Late August. The rainy season is over, the school holidays end in the third week of August, and the crowds drop sharply. This is the sweet spot for many experienced hikers: stable weather, all huts open, good conditions on the upper sections, and you can get a hut booking with two weeks’ notice rather than two months.
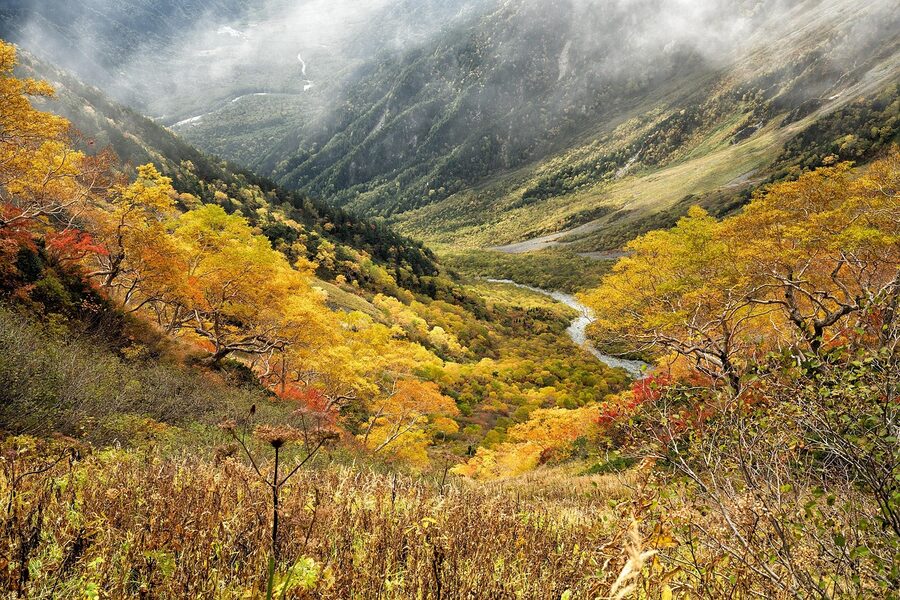
Mid-September to mid-October. The autumn colour window. The trees on the upper Yarisawa turn first, around the last week of September, and the colour band moves down to Yokoo and Tokusawa by the second week of October. Day temperatures fall fast, nights at the saddle hit freezing by early October, and the first snow can arrive any time after 1 October. Bring real cold-weather gear.
Late October. Yarigatake Sanso closes around 3 November. The huts in the Hidasawa close earlier. By the last week of October the upper trail is often dusted with snow and the route turns serious. Outside the season, the mountain is for winter mountaineers only.
Weather, forecasts, and the live cam
Weather on Yari changes fast and changes often. The forecasts that matter, in order of usefulness:
- tenki.jp Yarigatake mountain forecast: the best Japanese-language forecast, with hourly summit-altitude wind, temperature, and the “A/B/C” climbing index used by Japanese hikers.
- Mountain Forecast Yari-ga-take: English, six-day forecast at three altitude bands, less granular than tenki.jp but adequate.
- Yarigatake Sanso’s daily blog post. The hut staff post conditions and trail status almost every day in season at yarigatake.co.jp. This is the gold standard for actual on-the-ground reports.
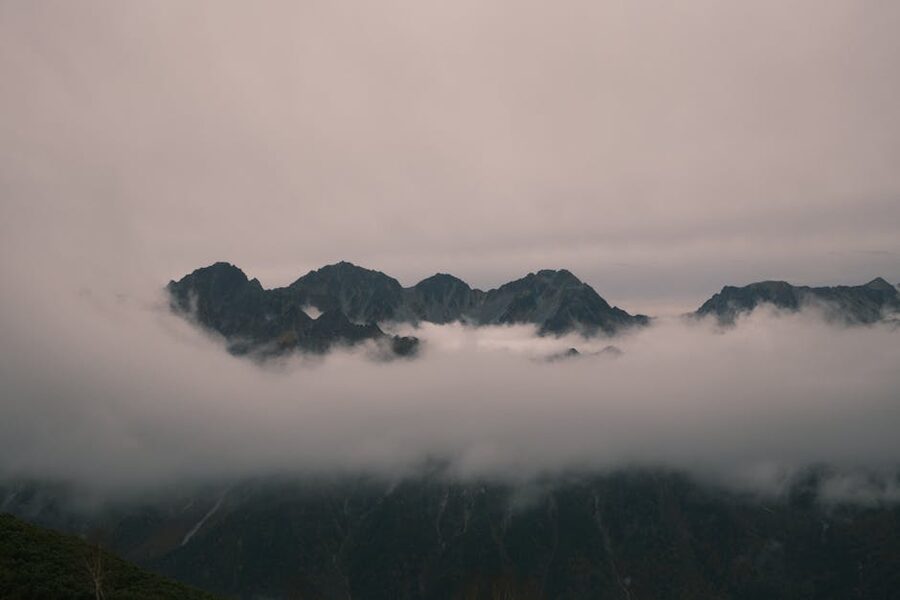
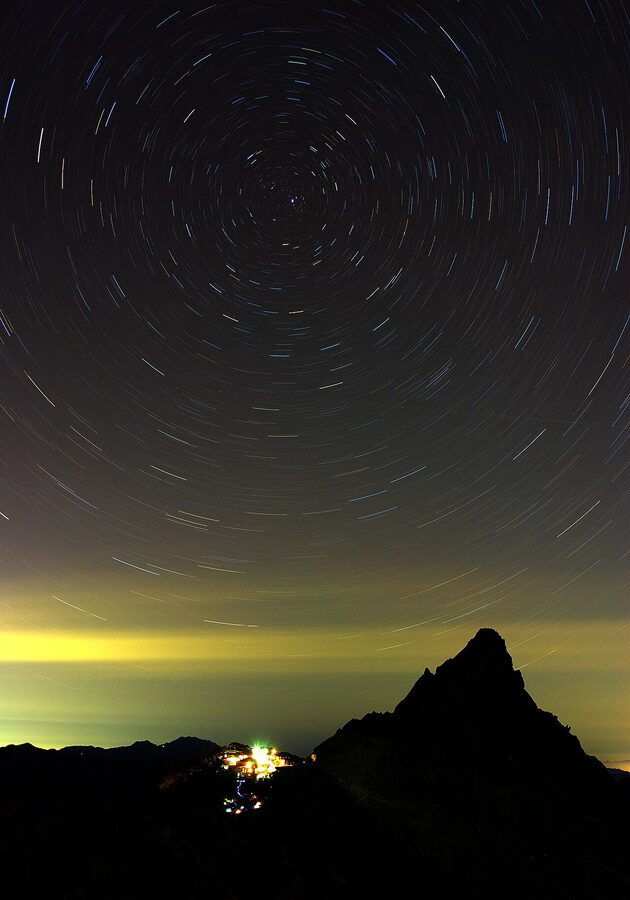
The Yarigatake live cam, run by the Yarigatake Sanso group, is the other pre-trip ritual. It updates every fifteen minutes from a fixed mount on the hut roof, pointing at the spear. Look at it for a week before your trip to see how often the summit is in cloud, when the morning fog lifts, what the snow looks like. The cam alone has tens of thousands of monthly viewers in Japanese, mostly people who’ve climbed Yari before and want to see what it’s doing today.
A practical rule of thumb. If the summit-altitude wind forecast is over 20 m/s, don’t climb the spear. If thunderstorms are forecast for the early afternoon, do the summit before breakfast or skip it. If the forecast is mixed but stable, go: conditions on Yari are often better than the valley forecast suggests because you’re above most of the cloud layer by lunchtime.
Getting there and to each trailhead
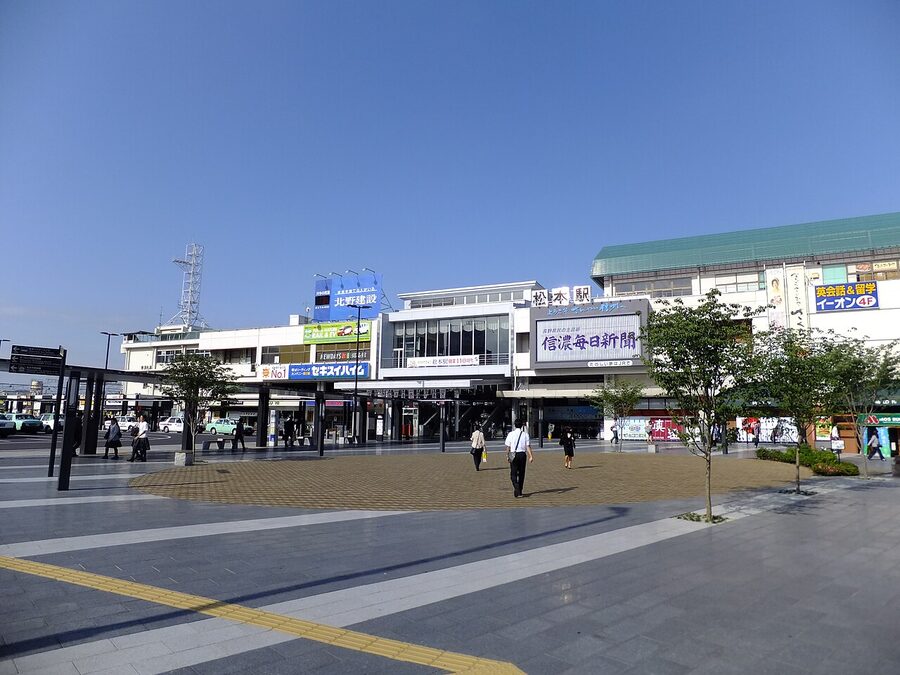
From Tokyo the practical base is Matsumoto, three hours west on the Azusa Limited Express from Shinjuku. The first Azusa of the day, leaving Shinjuku at 07:00, arrives in Matsumoto at 09:38, which is exactly the right time to catch the 09:55 bus to Kamikochi or the 09:55 to Hirayu Onsen for the Shin-Hotaka trailhead. The Hokuriku Shinkansen route via Toyama and the Matsumoto Express is also possible but slower. From Osaka and Kyoto the Tokai Hokuriku highway buses run direct to Hirayu Onsen overnight, which is the cheapest option for the Hidasawa route.
Which bus you want depends on your trailhead:
- Kamikochi (for Yarisawa): from Matsumoto Station bus stop 7, the Alpico bus runs every 30 minutes through summer and takes 90 minutes (¥2,710 one-way). Or from Shin-Shimashima Station via the Kamikochi Line train and a connecting bus, slightly cheaper. The official Kamikochi access page has the up-to-date timetable.
- Shin-Hotaka Onsen (for Hidasawa or Nishi-Kama): from Matsumoto take the bus to Hirayu Onsen (90 min, ¥2,800), then change for the Shin-Hotaka Ropeway bus (45 min, ¥910). From Takayama on the Gifu side, the direct Nohi bus is faster (90 min, ¥2,200). See Nohi Bus Shin-Hotaka line.
- Nakabusa Onsen (for Omote Ginza): from Hotaka Station on the Oito Line, a single bus runs three times a day in summer (60 min, ¥1,800). Reservations recommended in peak weeks.
The full set of approaches is covered in more depth in the Japan Alps access guide, including the night-bus options and which Limited Express seats to book for the best Azusa River views.
Getting to Kamikochi itself
Kamikochi the resort village (Kappa Bridge, the souvenir shops, the day-tripper crowds) is at the same place as Kamikochi the trailhead. You step off the bus, walk past the visitor centre and the convenience store, and you’re on the trail. The dedicated Kamikochi travel guide covers the village in detail, including which lodges to use as a pre-hike night and what to do with a half-day if you arrive early.
The first day from Kamikochi: what you’ll actually walk
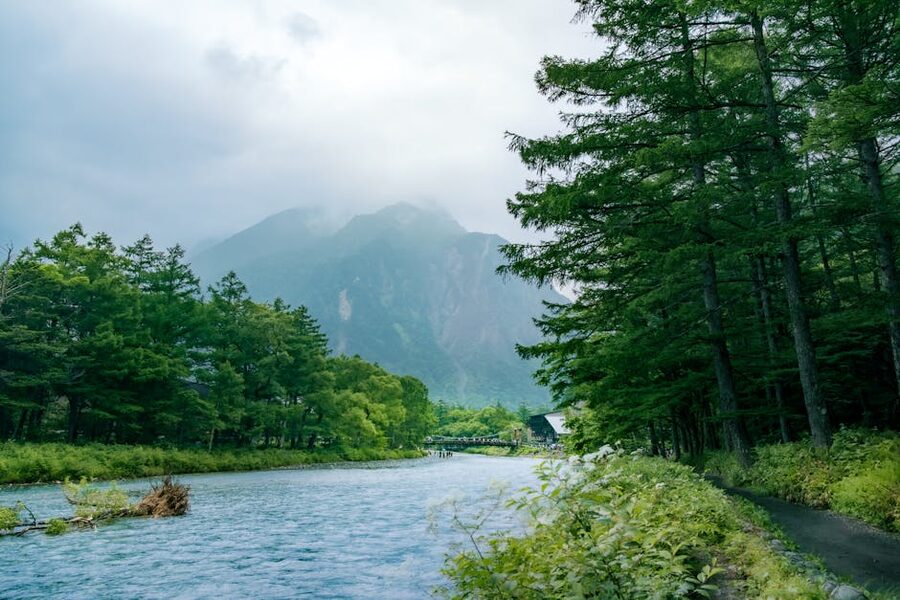
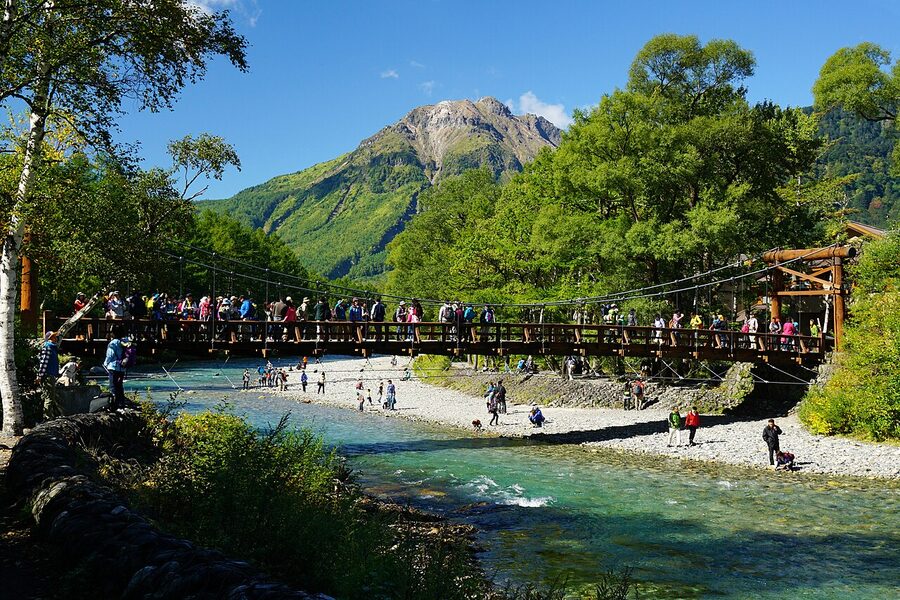
From Kappa Bridge the trail follows the Azusa upstream on the south bank. You’ll be on it with day hikers and tour groups for the first hour or so to Myojin Bridge, where most of the day-tripper crowd thins out. Myojin Pond is worth the optional 15-minute side trip via Hotaka-Okumiya Shrine on the north bank (¥500 entry to see the pond from inside the shrine grounds), but you can skip it without losing anything: the same pond is visible for free from the south-bank trail you’re already on.
From Myojin you continue past Tokusawa Lodge (good ice cream, decent free toilets, ~2.5 hours from Kappa) and Yokoo Sanso (the cut-off point: turn right and you’re committed to the climb; turn left across the Yokoo Ohashi bridge and you’re heading for Karasawa and Hotaka). The trail past Yokoo narrows, the riverbed turns rocky, and the gentle valley walk gives way to a proper ascent. Ninety minutes more to Yarisawa Lodge.
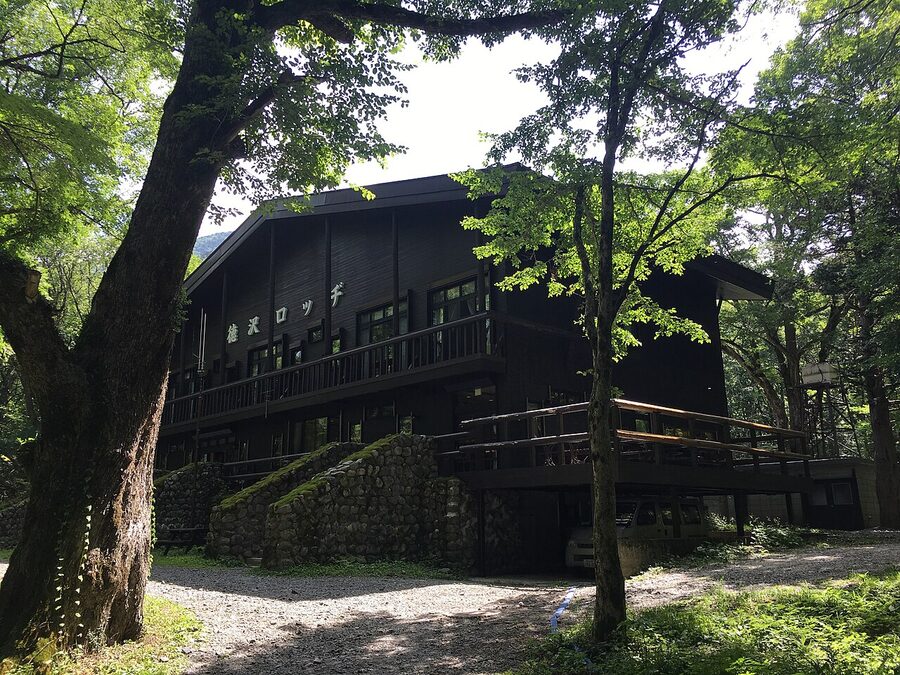
If you start late from Matsumoto and arrive at Kamikochi after 11:00, push only as far as Tokusawa for night one. The campsite here is one of the prettiest in the Northern Alps and the lodge has hot meals. Pushing to Yarisawa Lodge in fading light isn’t worth the small head-start it gives you on day two.
Altitude, fitness, and what to actually pack
You’ll sleep one night at 3,060m. That’s high enough that altitude-related symptoms (headaches, broken sleep, mild nausea) are common in the first 24 hours, especially if you came up fast from Tokyo. Drink twice as much water as you think you need on day one and day two; the dry mountain air dehydrates you faster than the cold suggests. If you’ve had altitude problems before on Fuji or in the Tateyama-Kurobe range, read the dedicated altitude sickness guide before you go.
The kit list, in order of how much it matters:
- Boots, broken in. The trail is rocky for the upper half. New boots will give you blisters by day two and the route is too long to limp through.
- Trekking poles. Not optional. The 2,200m descent on day three destroys knees without them.
- A real waterproof shell. Not a packable plastic poncho. Storms come in fast at altitude and you’ll be wet for hours.
- Helmet, or rent one for ¥500. For the summit scramble.
- Light micro-spikes if hiking before mid-July. The upper Yarisawa snowfields are easier with them than without.
- Cash, in larger quantities than you’d expect. Two nights at huts, lunch bentos, drinks at the canteen, helmet rental, and possibly a bus or two: budget ¥40,000 to ¥50,000 in cash for the full trip on top of your transport.
- Insurance. Not legally required but strongly recommended. Tokio Marine’s Mountain Insurance is the standard product, available in English, from ¥500 a day; the Yamap app sells day-by-day cover too.
The summit reward, and what you’ll see from the top
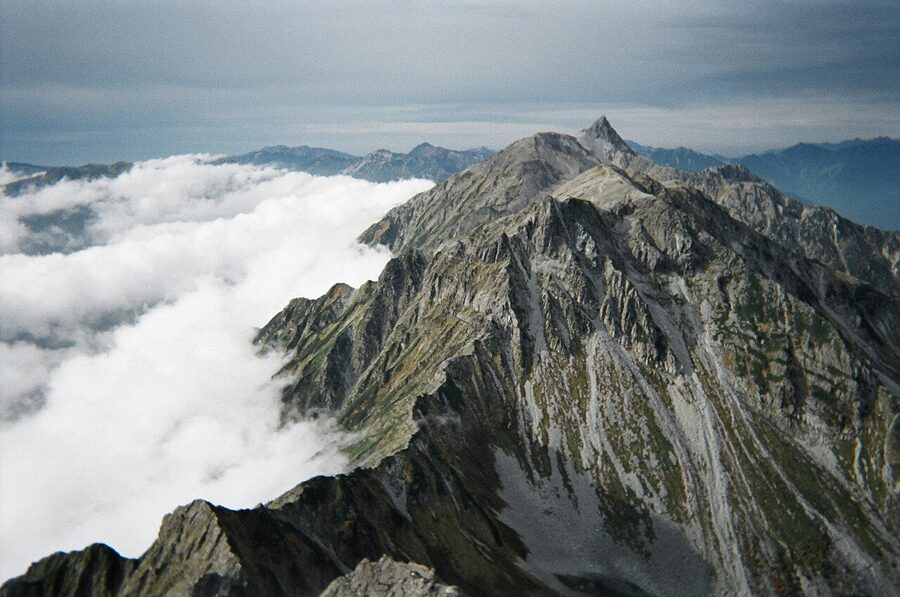
On a clear day from the spear you can see the whole Northern Alps. Mt Hotaka and the Daikiretto south. The Tsubakuro-Otenshō ridge east. The Sugoroku-Washiba ridge west. Mt Tateyama and Mt Tsurugi to the north on the far horizon. Mt Fuji to the south-east, smaller than you expect at 200km away but unmistakable. Mt Yatsugatake closer in. The whole geography of central Honshu rearranges itself into something you can suddenly see all at once.
On a cloudy day you’ll see the cairn, the shrine, the rope handles in front of you, and the people coming down the descent ladder waiting for you to move. That’s how the spear works. About one trip in three, the summit is socked in. The summit is still worth doing in cloud: the climb itself is the experience, and the cloud often parts for a minute somewhere in the next hour and gives you the panoramic view from the saddle. Don’t expect a sunset. Hope for one.
After the hike: down to Shin-Hotaka Onsen
If you’ve done the Hidasawa route you finish at Shin-Hotaka Onsen, which is the western entry to the Okuhida five-village hot-spring cluster. The traditional sequence at the end of a Northern Alps hike is: descend, drop pack at the ryokan, bath, beer, dinner. Shin-Hotaka has a handful of small ryokan within walking distance of the trailhead, including Yarimikan with its private river-view baths. The full lay of the cluster is in the Okuhida Onsen-go guide.
If you’ve done the Yarisawa route you finish back at Kamikochi, where the bath options are limited but the bus connections are excellent. Many Yarisawa hikers continue straight to Hirayu Onsen (35 minutes by bus) for the night, which has more ryokan choice and onward connections to Takayama or back to Matsumoto.
For both directions: book the night-of-finish bath stay before you start the hike, not after. You’ll be too tired to hunt for accommodation when you walk off the trail.
What to pair Yari with
Yari isn’t the kind of mountain you do as a one-and-done day trip. It’s the centrepiece of a longer week in central Honshu, and the natural extensions are obvious once you’re in the area:
- Combine with the Tateyama-Kurobe Alpine Route. The famous engineered crossing through the Northern Alps reaches 2,450m at Murodo and gives you a half-day above the treeline without any actual climbing. See the Tateyama-Kurobe Alpine Route guide for the route from Toyama to Ogizawa.
- Combine with Mt Hotaka. If you’re competent on chained ridges, the Yari-Hotaka traverse is the iconic line; if you want Hotaka without the Daikiretto, the Karasawa cirque approach is one of the most beautiful walks in Japan, especially in early October. The Mt Hotaka guide has the full route picture.
- Use Matsumoto as your base. Two nights in Matsumoto bookending the hike works well. Things to do, where to stay, and the connection to Kamikochi are in the Matsumoto travel guide.
- Add a hot-spring day. Either Shin-Hotaka via Okuhida or Hirayu Onsen on the Gifu side, or back across to Norikura Kogen via the eastern ridge. Plenty of options.
Banryū’s cave is still on the trail, slightly above the 2,500m mark on the Yarisawa route. There’s a small jizo statue inside it. Most hikers walk past without noticing because the trail bends sharply away from it; if you stop and look up to your left at the right point, you’ll see the dark notch in the rock. The monk who first climbed Yari sat there for fifty-four days, listening to the wind. The wind sounds the same now.