In This Review
- Kumiko feels like a wood puzzle with history
- Key highlights you’ll care about
- Kumiko in Tonami: what you’re building and why it matters
- Meeting the craft at the workshop: how the hour actually flows
- Choosing your kumiko design: small decisions, big difference
- Building it: precise wooden pieces that fit together
- The shoin-zukuri room tour: see the craft in real architecture
- Price and value: is $42.35 a good deal
- Location feel: why Inami woodcarving fans will perk up
- Who should book this kumiko experience
- Planning tips: how to get the most out of one hour
- Should you book it?
- FAQ
- How long is the kumiko workshop experience?
- How much does the experience cost?
- What’s included in the price?
- What is not included?
- How many travelers are in the group?
- Can I choose which kumiko design to make?
- Do I need to print a ticket?
Kumiko feels like a wood puzzle with history
Woodwork that clicks into place is strangely addictive. This kumiko experience in Toyama Prefecture mixes a short history lesson with a real hands-on build, guided by a master craftsman, and then you get to see the results of Japanese joinery in a traditional shoin-zukuri room.
The two things I really like: first, you get to choose a design and assemble it with careful step-by-step support, using precisely cut pieces and doing classic-style construction. Second, the workshop doesn’t end at your hands—you also tour a traditional Japanese room with woodwork details that make the patterns feel less abstract and more practical.
One thing to weigh: the whole experience runs about 1 hour, so you’ll make a small piece rather than a big project, and at $42.35 it may feel high if you were hoping for a longer, more elaborate build.
Key highlights you’ll care about
- A master craftsman’s explanation of what kumiko patterns mean in Japanese architecture
- Pick from 2 or 3 prepped designs, then build your own lattice piece
- Hands-on joinery style using precisely cut wooden parts without nails or tools (for the core build)
- You also tour a shoin-zukuri room, so you see how the craft fits real buildings
- Small group size (max 10), which helps you get attention when you get stuck
- Material cost included, so there’s no surprise add-on for what you make
If you're still narrowing it down, here are other tours in Toyama Prefecture we've reviewed.

Kumiko in Tonami: what you’re building and why it matters
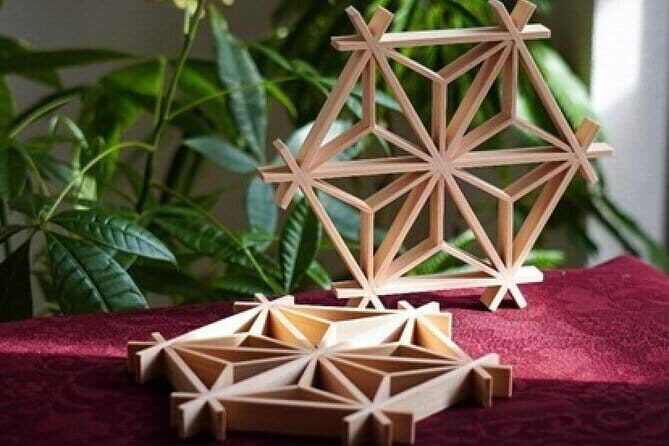
Kumiko is the Japanese art of making lattice-like wooden patterns used in traditional architecture—think sliding doors, screens, and panels where structure and decoration share the same job. The patterns are not random. They follow ideas about balance, rhythm, and fitting pieces together so the design holds its shape.
In Tonami (Toyama Prefecture), the craft is presented in a way that’s easy to understand even if you’re brand-new. You don’t just get handed a kit. You start with the meaning behind the patterns and where they show up in Japanese buildings. That context matters because it changes how you look at the finished piece. Instead of feeling like a small wood ornament, your kumiko starts to feel like a tiny piece of architecture.
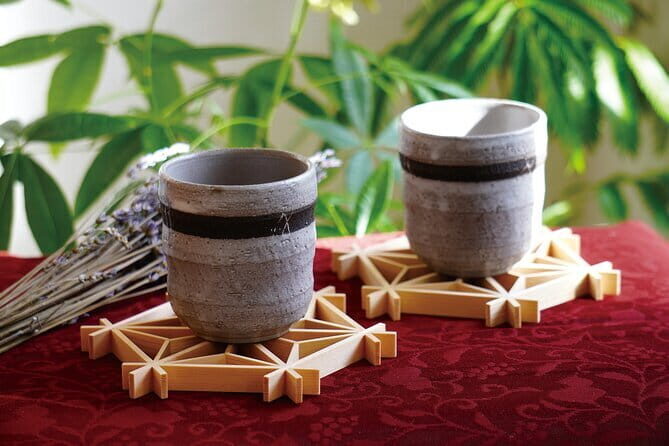
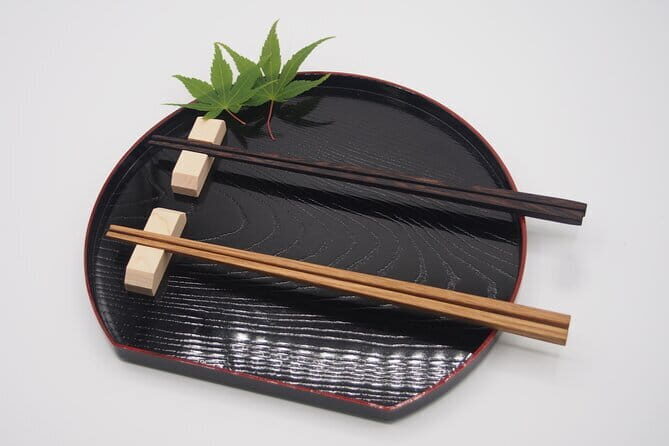
And yes, you’ll make something physical. Expect a finished wooden lattice craft you can bring home. The tone of the experience is practical: line up the parts, follow the instructions, and learn what the master craftsman wants you to watch for.
Meeting the craft at the workshop: how the hour actually flows
The session is short on purpose—about 1 hour—and that keeps the pacing focused. You’ll meet at 511-2 Aradakaya, Tonami, Toyama 939-1324, Japan and then stay local to the workshop site.
Time-wise, the flow usually looks like this:
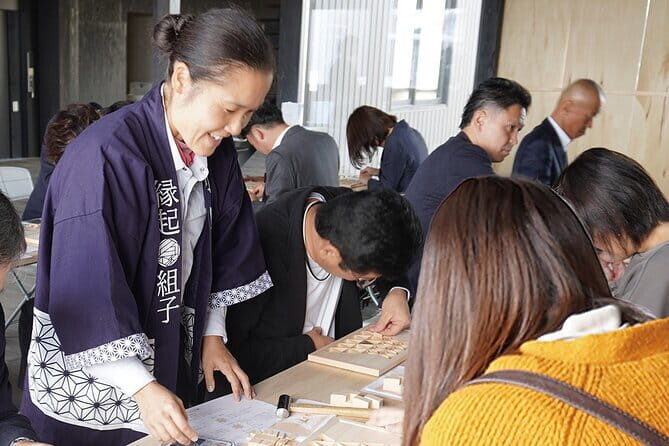
- You begin with an explanation of kumiko and the symbolism behind the patterns.
- You choose one design from two or three options that the workshop has prepared.
- You get hands-on guidance as you assemble your selected piece.
- After the build, you tour a traditional shoin-zukuri room and see kumiko-style workmanship applied in the building’s fixtures.
This “learn, build, then see it in context” order is what makes the experience click. If you’re the type who likes to understand what you’re doing while you do it, this format is a win.
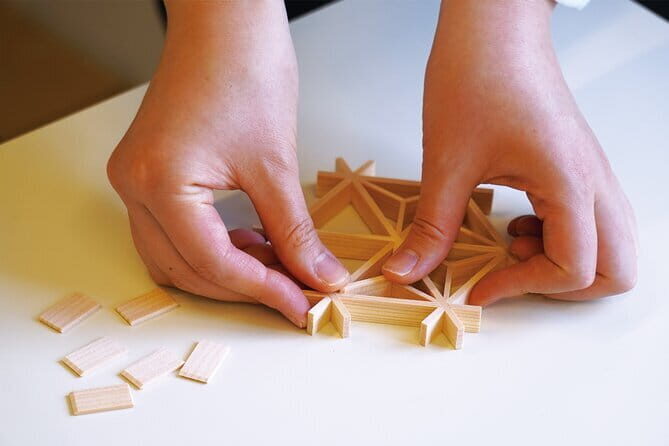
Choosing your kumiko design: small decisions, big difference

One of the smarter parts of this experience is that you don’t end up with a random project. You can choose from two or three kumiko designs prepared ahead of time. That gives you control over what you’ll bring home.
If you want a safer path as a beginner, pick a design that looks simpler at a glance—fewer repeating sections, less dense patterning, and clearer lines for where pieces should meet. Kumiko rewards patience, and it’s easier to feel confident when your first build has visible structure.
If you want the challenge (in a good way), choose a design with tighter geometry. The workshop emphasizes careful alignment, and the design will reflect how much that matters. Either way, you’ll get instructions and guidance as you assemble your piece.
Building it: precise wooden pieces that fit together
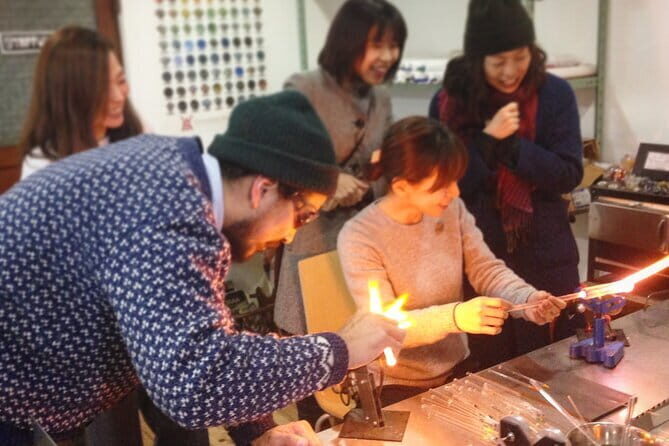
The hands-on part is where kumiko becomes fun. Your kit uses precisely cut wooden components, and the core build emphasizes assembling pieces without the usual distraction of nails or tools. The goal is to get you thinking like a maker: fit, check, adjust, then move on.
I like this style of workshop because it’s not brute-force carpentry. It’s closer to a careful puzzle where every piece has a job. The master craftsman’s support matters here. When you’re holding tiny parts and your brain wants to rush, having someone explain what to look for keeps you from forcing things.
Based on what you’ll experience, expect a mix of:
- learning how the lattice should sit,
- following the instructions provided with the kit,
- getting corrections if your placement is slightly off,
- and gradually feeling the structure take shape.
Also, this is the kind of workshop where questions come naturally. You may find yourself asking about the techniques, the wood choices, and why certain patterns are easier or harder to assemble. The instruction style is patient and answers-focused, which makes a short session feel less rushed.
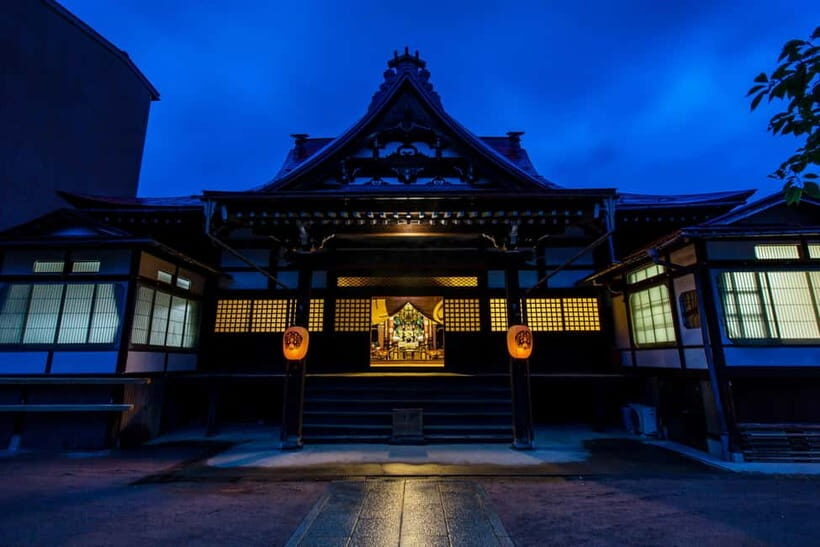
The shoin-zukuri room tour: see the craft in real architecture

After your build, you’ll tour a traditional Japanese shoin-zukuri room. This is the part that turns your finished kumiko from a craft souvenir into something you can visualize in context.
Shoin-zukuri is known for refined interiors and carefully planned architectural details. In a room like this, you can see woodwork used as a design element and as functional structure. You’ll notice patterns, paneling, and the way joinery supports the overall look.
This tour also helps you connect dots. Kumiko isn’t just a technique used somewhere else. It’s part of how traditional spaces are designed and built. Seeing the craft applied in fixtures makes your own lattice feel like it belongs to a larger tradition of wood architecture.
If you’re the type who loves interiors, this stop is your payoff. Even if your own piece feels small, the room tour shows what the makers were aiming for: precision, calm, and structure that doesn’t need extra decoration to impress.
Price and value: is $42.35 a good deal
At $42.35 per person for about 1 hour, the price may raise an eyebrow at first—especially if you’re comparing it to longer workshops or experiences that include more materials or a bigger final product.
But here’s where the value comes from:
- Material cost is included, so you’re not paying extra just to make the item.
- You get a master craftsman’s explanation, not just a self-guided kit.
- The session includes both hands-on assembly and a traditional room tour, which is rare for a short workshop.
- It’s capped at a maximum of 10 travelers, so attention is more realistic than in a crowded class.
Still, let’s be honest: if your main goal is a very large project, or you want a full-day woodworking experience, this probably won’t satisfy. The cost-to-time ratio is best for people who want a focused cultural craft moment with real guidance.
I’d call it a good value if you enjoy precision crafts and you want the architectural context. If you only want the finished item with no explanation and no room tour, then it may feel expensive for what you end up making.
Location feel: why Inami woodcarving fans will perk up

You’ll be in an area known for traditional woodcraft. The workshop is in the Tonami region, and this part of Japan has a long reputation for wood carving and woodworking traditions. That matters because you’re not doing kumiko in a random tourist setting. The craft is presented where people actually care about wood and joinery.
If you’ve taken other lattice/joinery workshops elsewhere in Japan, this one has a particular vibe. The focus stays tightly on kumiko lattice assembly and architecture. One useful heads-up: if you’ve done yoseki-style experiences in places like Hakone, don’t expect the exact same process. Here the “DNA” is kumiko construction and the pattern meaning tied to architecture.
Who should book this kumiko experience
This workshop fits best if you:
- enjoy crafts where precision matters,
- like learning why something is made a certain way, not just how to assemble it,
- want a short, concentrated activity that doesn’t eat your whole day,
- and appreciate seeing the finished technique inside a real traditional setting.
It’s also a good choice for travelers who are curious about Japanese design. Kumiko is visual and architectural, and the shoin-zukuri room tour adds perspective fast.
If you dislike small, detailed tasks, or you get frustrated with fine alignment, you might find the assembly part challenging. The good news is that the instruction style aims to keep you moving, and the group size helps.
Planning tips: how to get the most out of one hour
Because time is tight, come ready to slow down. Kumiko rewards careful placement, and the master craftsman guidance works best when you pause to listen and then build.
A few practical tips:
- Watch the alignment steps the first time you see them. Your second attempt will be much easier.
- Ask questions when you’re holding the parts, not after you’re done. That’s when the explanation is most useful.
- Treat the room tour as part of the lesson. Look at how wood details work together, not only at individual decorations.
Also, since this is a mobile ticket experience, you’ll want your phone charged and easy to access when you arrive.
Should you book it?
Yes, if you want a guided, architectural craft experience in a small group, and you’re happy with a 1-hour session and a smaller finished piece. Kumiko here is more than a do-it-yourself souvenir—you get pattern meaning, hands-on joinery, and a shoin-zukuri room tour that ties it back to real architecture.
Skip it only if your priority is a longer project, you dislike precise assembly work, or you’re mainly collecting lots of activities rather than learning one technique deeply enough to remember what it stands for.
If that sounds like you, book the spot with confidence. This is one of those rare workshops where the craft isn’t just shown—it’s explained, built, and then placed back into the kind of room where it belongs.
FAQ
How long is the kumiko workshop experience?
It runs for about 1 hour (approx.).
How much does the experience cost?
The price is $42.35 per person.
What’s included in the price?
The experience fee and material cost are included.
What is not included?
Other personal expenses are not included.
How many travelers are in the group?
The activity has a maximum of 10 travelers.
Can I choose which kumiko design to make?
Yes. You can choose one from the two or three kumiko designs prepared for you.
Do I need to print a ticket?
No. This is a mobile ticket experience. Confirmation is received at the time of booking.